
Haida IR20 Filter Review
It was with great pleasure that I received this filter from Haida. I was always curious to try infrared photography. Haida was going to send me a 150mm filter and in conversation with Karen I told her that I liked to try the IR filter, and then she told me she was sending the IR filter.
I confess that wasn't very easy to get used to him, it´s a little bit confused the part of the pos prodution.
First of all we have to understand what is Infrared
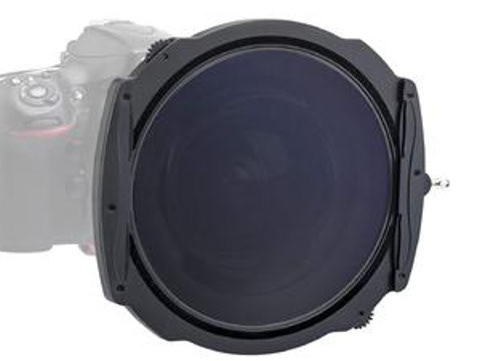
PACKAGING AND UNBOXING
In the Box:
- Protection Metal Box
- IR720 Filter
- Foam Gasket
SPECIFICATIONS
- 150 x 150 Filter,
- 2mm of thickness,
- Nanopro multicoated on both sides of glass,
- K9 High Quality Optical Glass Construction,
- Anti-water and Anti-oil Coatings
WHAT IS INFRARED PHOTOGRAPHY
We are used to seeing the world in colours. But there is more to colours than the so called visible light spectrum that our brains perceive. Visible light takes up a small fraction of the entire electromagnetic spectrum.
Infrared light starts right after the red light of visible spectra and is, therefore, invisible to us. In infrared photography, the sensor (or the film) reacts to infrared light while a filter will cut all visible and UV light. For the kind of infrared photography we are interested in, we use the so called near-infrared light (see image above).
We don’t usually see infrared images. Because of this, infrared photography can turn any view into an unexpected masterpiece.
We don’t usually see infrared images. Because of this, infrared photography can turn any view into an unexpected masterpiece.
All you need is a tripod, as you will be doing long exposures, and an infrared filter such as the IR Filter. You don’t even have to rush out and invest in a modified camera yet. Just make sure your current camera can see infrared light (photograph the LED light on your remote control).
WHAT DO UNEDITED INFRARED PHOTOS LOOK LIKE
When you take an infrared photo with a filter, you will see a very red image on your screen or viewfinder. This is because the filter will let only light with wavelengths of 720nm (high reds) and longer pass.
ABOUT HAIDA
"Haida" in English translates to "All rivers run into the sea, all rivers flow to one".
Haida was founded in 2007, headquartered in Ningbo, China
The company focuses on research and development and manufacture of various types of optical filters, is a professional photographic filters, film filters and other products as the core of high-end manufacturing and brand marketing company. Haida has its own distribution network in more than 40 countries around the world now, especially in the European and American market. Haida products are deeply praised and loved by professional photographers, photo enthusiasts and professional photography magazines. The Haida team is constantly providing innovative products and services to photographers around the world.
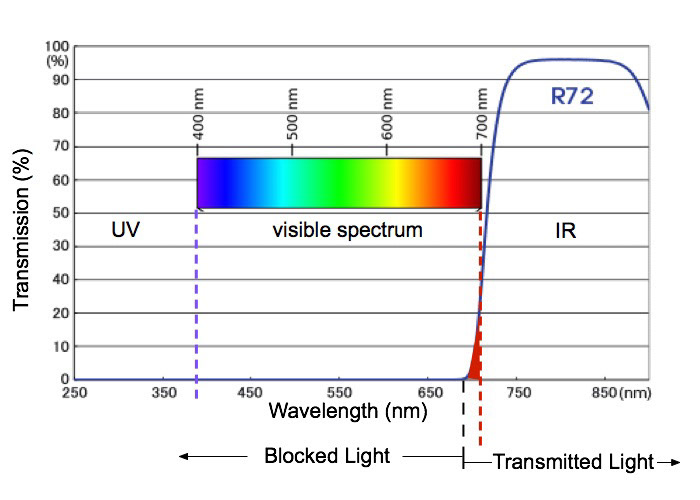
The fact that the Haida IR720 nm lets some visible red light pass is very useful. With IR filters that block light with longer wavelengths, such as those at 850nm, all visible light is blocked by the filter. This means you will see nothing of the scene you are trying to frame, focus and photograph.
Below is a typical infrared image straight from the camera, taken with the Haida IR720 filter. While it is unpleasantly red, I could easily compose and focus.
Below is a typical infrared image straight from the camera, taken with the Haida IR720 filter. While it is unpleasantly red, I could easily compose and focus.
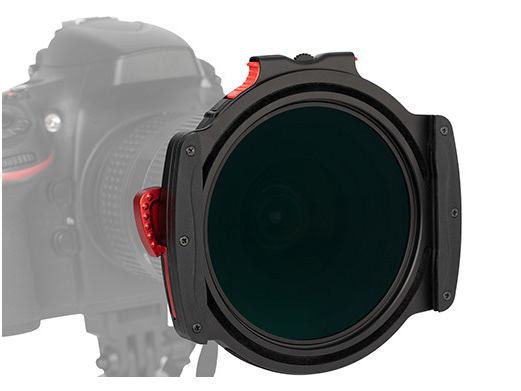
OVERVIEW
The Haida NanoPro Infrared 720 Filter is designed to help capture images of how a subject reflects or transmits infrared light. Infrared light waves occupy the space in the electromagnetic spectrum behind visible light due to their longer wavelengths. Many surfaces and materials react to or emit infrared light waves differently than visible light waves, which provides the potential for photographs of subjects or subject properties that are otherwise invisible to the human eye. Such images require an infrared-sensitive medium such as infrared film or a digital photographic sensor, which may be more effective when used without the infrared-blocking filters that are frequently built over them. Conventional light sources such as the sun, photographic strobes, or incandescent lighting may be used to provide infrared illumination. However, because infrared films or digital photographic sensors can be more sensitive to the relatively higher energy and shorter-wavelength visible light those sources also emit, the effects of infrared light can be otherwise obscured.
This Haida NanoPro Infrared 720 Filter makes it possible to capture images of how subjects are illuminated by infrared light by blocking ultraviolet and visible light waves less than 670nm from entering the lens it is mounted onto. Instead, visible and infrared light at or above 670nm is progressively transmitted, with 50% of infrared light at 720nm and up to 98-99% of infrared light at 950nm. Haida NanoPro IR 720 filters are constructed from K9 High Quality Optical glass and feature anti-oil, anti-water coatings to help reduce surface reflections for increased contrast and clarity, while additional hydrophobic coatings result in an improved beading effect when in contact with water for easy cleaning.
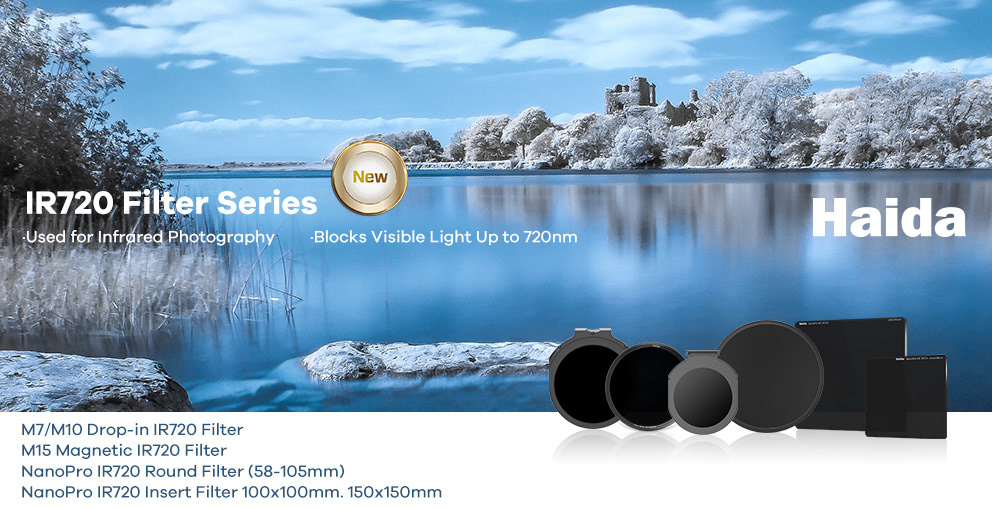
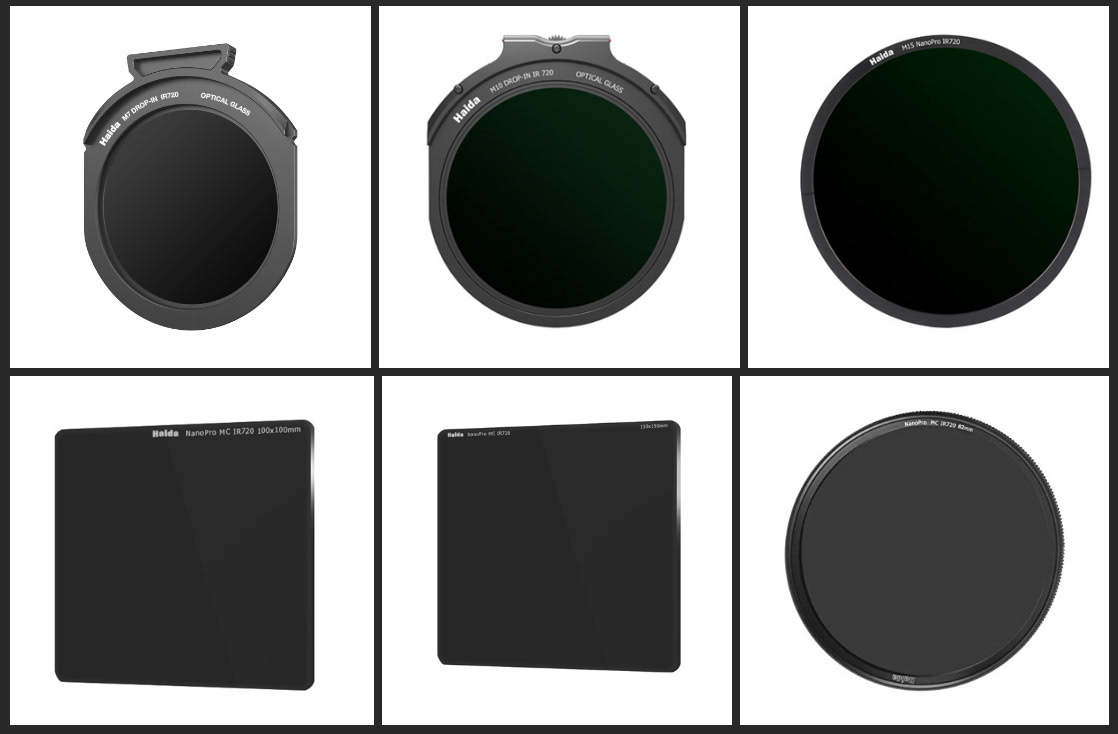
IR720 FILTER SERIES
Haida Have 6 Type IR system
- M7 drop-in filter,
- M10 drop-in filter,
- M15 magnetic filter,
- 100x100 mm square filter,
- 100x150 mm square filter
- Round filter (58mm, 62mm, 67mm, 72mm, 77mm, 82mm, 95mm, 105mm)
HOW TO USE
TYPE OF LIGHT
Whereas harsh midday sunlight is often said to be a bad thing for convential color landscape photography, but this is far from true for infrared photography. Overcast light sometimes gives quite dull results where harsh sunny light gives a nice contrast to the photo. The difference can be seen in the examples below, where there was either shadow or sunlight on the land parts.
CAMERA VS FILTER
As you can see I opted to use filters to do IR photography, but I confess that it was not an easy task, because I tried to shoot with Sony and I couldn't get any results, until after much research I tried at Nikon and got much better results , I will now explain to you how you can try to check if your camera accepts IR lights. In the first case, you first need to see if your camera is suitable for infrared by performing a very simple test. Just take a remote control, press any button, and take a picture while pressing the butting (and aiming the remote control at your camera of course....). Remote controls work by sending infrared light, so this is a perfect way to test your camera.
The sensors of digital cameras are sensitive to both visible light and infrared light, but we usually want to take pictures of what we see, and we don't see any infrared light. Therefore, cameras are equipped with so-called hot mirrors, which is a piece of glass in front of the sensor that blocks infrared light (as well as ultraviolet). Cameras without a hot mirror are called full spectrum cameras and, because the infrared light is not blocked, pictures get a strange pinkish hue, like in the example on the left. This is not an actual picture taken with a full spectrum camera, but an approximation that I made in Photoshop.
If you want to take infrared pictures with a digital camera, there are two options:
• You use your camera as such and put an external infrared filter on your lens, which blocks visible light but is transparent for infrared light. The advantage of this system is that you can use a regular camera, but the disadvantage is that you will need very long shutter speeds (tens of seconds, or maybe even more) because of the hot mirror in your camera. Having an external filter on your lens which blocks visible light, combined with a hot mirror on your sensor which blocks infrared light, means that very little light reaches the sensor, which is the reason why you need really long shutter speeds.
• You convert your camera to a dedicated infrared camera by replacing the hot mirror with a so-called cold mirror, which blocks visible light, but lets infrared light through. The disadvantage is that the camera can only take infrared pictures, but it has several advantages. The camera will take pictures with normal exposure times, you don't need any external filter, and you can freely exchange lenses. A bit of care should be taken with replacing the hot mirror though, because it might be that it also acts as the anti-aliasing filter.
If your camera is sufficiently sensitive to infrared, you can put an external infrared filter on your lens, and take pictures with really long exposure times. But it's not very convenient, both because of the long exposure times, and because it is really difficult to compose with a black filter on your system. So you have to take off the filter, compose and focus, put the filter back on, and take the picture. I did this a couple of times, but it made me feel really frustrated and I quickly stopped taking infrared pictures. So I have converted some of my cameras to dedicated infrared cameras, and that's when the fun starts! No more long exposures and no more filters on and off.
COMPOSITION
This filter blocks a lot of light, I risk to say that the first thing to do in IR photography is make your composition, and then insert the filter.
The most common subjects for IR photography are landscapes. That’s because they can appear unusual and unexpected.
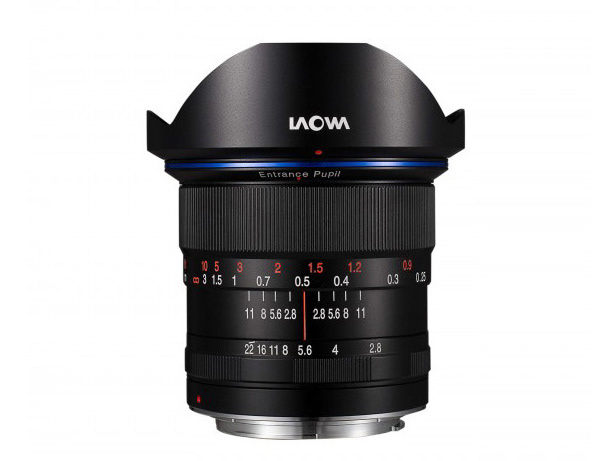
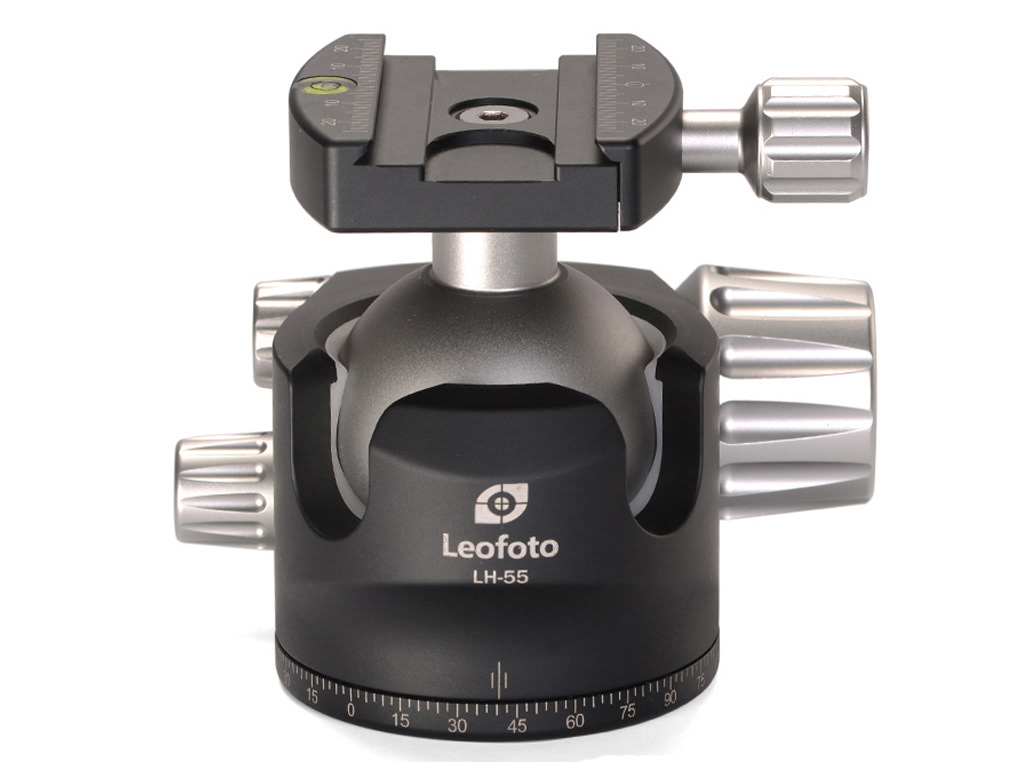
EQUIPMENT
If your camera passed the sensitivity test, you’ll need two more pieces of equipment before you can shoot infrared photos, a tripod and an infrared filter. The tripod will help you take a sharp shot, as your exposure times will be quite long. The filter will block most of the visible light from reaching your camera sensor, but will allow the beautiful infrared light to pass through. If you use a square filter, make sure to slide it into the slot closest to the camera to prevent unwanted visible light from sneaking in.
CAMERA SETTINGS
Because the infrared filter blocks out most of the visible light, your exposures will be quite long. You’ll have to adjust your camera settings to ensure you get a good exposure, while keeping noise to a minimum. Set up your camera on your tripod and make these adjustments:
Set your ISO
Try to use the aperture to around f/8 for maximum sharpness.
Shooting in RAW will give you a bit more latitude for processing and adjusting. Bracketing will help you find the sweet spot for exposure at your preferred aperture and ISO.
I’m not going to go deep into the White Balance setting, but the recomended way to set your WB, is to use a Preset of your camera, and shoot a photo to the most green part of the composition.
WHITE BALANCE
If you take an infrared photo with the camera set to auto white balance, then it will probably look very red. That's no surprise, since we are shooting infrared, but it doesn't make it very easy to judge your picture. So it is best to make a white balance preset in your camera, by calibrating it on something that is rendered white in infrared, like grass or foliage ussing the preset WB.
There is one problem with infrared RAW files when you use Adobe Camera Raw. The white balance sliders in Adobe Camera Raw can't get low enough to get the same white balance that you obtained on the camera, and your photos will look a lot redder in the RAW editor than they did on your camera. Below on the right you can see how an infrared photo looks in Adobe Camera Raw with the sliders as far to the left as possible. The photo is still reddish and the foliage is not at all white, as I would like to have it.
Fortunately, there is a solution to this problem, which is to make a special camera profile for your infrared camera by using a program called DNG Profile Editor, which can be dowloaded for free. First you save one of your infrared RAW files as a DNG file, after which you open it in DNG Profile Editor. Now you go to the tab Color Matrices on the right, and pull the Temperature slider under White Balance Calibration to the left until your reach the desired white balance (foliage looking white would be a good standard). Now you can export the profile after which the new camera profile can be selected in Adobe Camera Raw under Camera Calibration. Your photo should now look a lot better and you can continue as usual with the RAW editor.
CHANNEL SWAPPING
Channel swapping is a technique that is used specifically in infrared photography. It exchanges the information from the red channel with the information from the blue channel, giving blue skies.
Channel swapping is done in Photoshop by opening the channel mixer, selecting the red channel, and adjusting the reds to 0% and the blues to 100%. Then, select the blue channel, and adjust the reds to 100% and the blues to 0%. That's it! It's possible to take different values of course, if that gives better results.
FALSE COLOUR
Just to touch briefly on the colour imagery. Infrared light doesn't have any colour as it exists beyond the range of visible light - which is where the colours that we can see occur. The IR720 filter has a slight red tint to it which enables it to capture the infrared light and for this to have a slight colour so we can see it.
Once photographed, the colour post-processing common to infrared images is known as "false colour". This is because the colours represented are not what our eyes would see or with a regular camera. Here the colour channels are swapped and red tones are replaced with blues, and blues with red. This results in an array of different colours applied to parts of the image, depending on how they reflected or absorbed the light and helps to create the unusual and unexpected colour combinations.
WHAT SUBJECTS TO SHOOT?
Infrared photography works extremely well with landscape images and other scenes in nature. Tonality changes quite radically under infrared light as colours and tones are recorded on the basis of reflectiveness: Leaves and other foliage reflect the most infrared light and accordingly will be the brightest white elements in your images. Other objects, such as the sky, rocks and mountains will absorb more of this type of light and will become the darker elements in your images.
Bear in mind that as you have to use long exposures with the IR720, you won't be able to freeze motion when using the filter. You can still produce similar effects as those taken with ND filters e.g, such as moving clouds becoming streaks of light, flattening water and removing people and traffic from scenes.
Another great benefit to shooting infrared images is that you are not necessarily dependent on great weather for a successful image. You can create stunning images on a bright day with the sun high in the sky or on a darken rainy afternoon too.
FINAL THOUGHTS
As far as the quality of the filters go, they seem fine to me, and great value for the price. I'm not so sure on the wavelength cut-off labelling though.
If you are considering infrared photography or looking to add a new array of unique images to your portfolio then you should really consider the Haida IR720 filter.
I have found that it opens up a whole new realm of photography without the need to undertake permanent physical changes to my camera or great expense. It is something I can confidently say has a permanent place in my camera bag when I am out shooting long exposure images.
The images taken throughout this article - all with the Haida IR720 filter - depends on how you envision them and how you decide to process them: i.e in black and white or false colour.
I hope that you find this article useful.
WHAT I LIKED
-Premium quality
- Sharp Photo
- Easy to use
- Textured frame for easy fitting