Dodging & Burning has been around since photography began and that is a long time ago, even before Facebook or Instagram. The fact that Dodge & Burn is still being used in the digital darkroom is testament to its effectiveness and a great reason why you could implement this editing style into your post-processing workflow.
Originally, Dodging & Burning was done manually. When a photographic print was being exposed the photographer could use their hand, or any other implement to stop light from hitting certain parts of the photograph as it was being exposed. The paper would be in a tray of chemicals with a light shining from above. This is called dodging as it affected the light areas of a photograph and made them lighter still.
To burn, the opposite was done. A photograph would be exposed correctly, then certain areas would have more exposure light applied to them in a targeted way, perhaps with a cut-out piece of card, hands, or anything which would let light be directed to particular parts of the photograph. This exposed those areas of the picture more, in turn darkening that spot, or ‘burning’ it.
Yeah yeah, let’s not get too old school, what’s the point anyway?
Some potential uses for dodge and burn include:
-creating contrast in the image;
-lighting highlights
-darkening shadows
-enhancing leading lines
-creating space through light or dark
-enhancing focal points
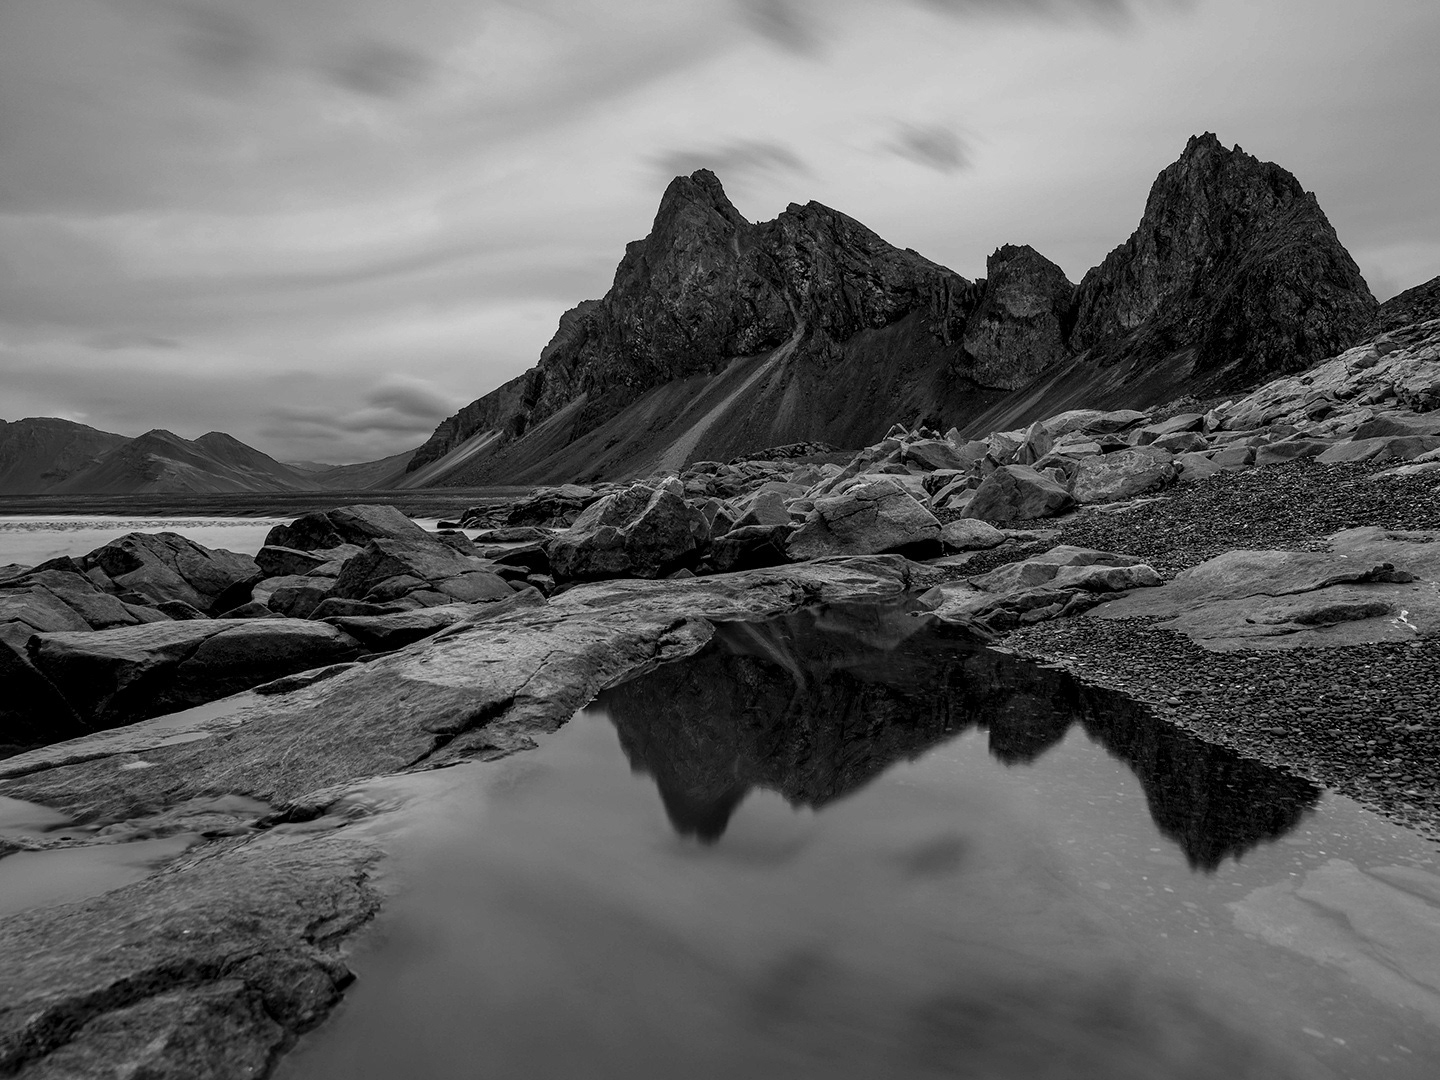
Perhaps the main point of Dodging &Burning is to emphasize the primary subject in your landscape photograph, or where the viewers eye should be lead. Often when shooting landscapes there is a compositional device which leads the viewer’s eye to the subject. This could be anything such as a road, curved path or river, which can be manipulated to be brighter or darker, helping the eye along to the main show piece – perhaps a mountain in the distance. Similarly, the main focus area can be exaggerated by either lightening or darkening it, again to draw attention to that focal point of the image. So if it was a mountain with snow, light areas could be dodged and rocks burned in order to create contrast and strengthen the view.
A landscape photographer is often faced with relative chaos in front of them, which nature has offered up as a challenge. Dodging & Burning can help the viewer overcome natures hurdles by making it easier for their eyes to run smoothly throughout the image.
Dodging and Burning Tools
Since we know dodging and burning is simply darkening and lightening parts of the image, what tools do we use for this in post-production?
-creating contrast in the image;
-lighting highlights
-darkening shadows
-enhancing leading lines
-creating space through light or dark
-enhancing focal points
Perhaps the main point of Dodging &Burning is to emphasize the primary subject in your landscape photograph, or where the viewers eye should be lead. Often when shooting landscapes there is a compositional device which leads the viewer’s eye to the subject. This could be anything such as a road, curved path or river, which can be manipulated to be brighter or darker, helping the eye along to the main show piece – perhaps a mountain in the distance. Similarly, the main focus area can be exaggerated by either lightening or darkening it, again to draw attention to that focal point of the image. So if it was a mountain with snow, light areas could be dodged and rocks burned in order to create contrast and strengthen the view.
A landscape photographer is often faced with relative chaos in front of them, which nature has offered up as a challenge. Dodging & Burning can help the viewer overcome natures hurdles by making it easier for their eyes to run smoothly throughout the image.
Dodging and Burning Tools
Since we know dodging and burning is simply darkening and lightening parts of the image, what tools do we use for this in post-production?
Without even going into Photoshop, you can use the adjustment brush in Lightroom to paint in some darkening or lightening on certain areas of the image you are working on. This can, of course, be done using the Adjustment Brush in Lightroom. This may be ok for simple edits here and there but there are a few problems with the Lightroom Develop Module. First, you’re working with a RAW image and not actually working on PIXEL based layers like you do in Photoshop. This creates a considerably less responsive brush because Lightroom (and Adobe Camera RAW) works differently than Photoshop when working on RASTERIZED PIXEL based layers. Don’t worry if that seems like a big word or phrase!! RASTERIZED simply means made into a “Pixel Based” layer.
Working with the file in Photoshop as pixel based layer will always be faster than editing in Lightroom because every adjustment you make in Lightroom is being saved and then the image updated to show these changes. In Photoshop, any adjustment or brush stroke is instant and very smooth and that is important when dodging and burning.
Photoshop Dodge and Burn Tools
Photoshop has Dodge and Burn tools built right into the Photoshop toolbar. They are pretty good to work with as you can target highlights, midtones or shadows – somewhat. The bleed over into other tones isn’t very well controlled.
Another problem with these older Photoshop tools is that they are part of a destructive workflow where you are working on the pixel containing layer itself. This is not part of a non destructive workflow and the beauty and power of Photoshop is doing just that; working non destructively on your images with layers.
Curves Dodge and Burn Layers
Adjustment layers are the heart of Photoshop and it is where all the flexibility and power come into play. Curves adjustments are great for both tonal adjustments as well as color editing. To dodge and burn using Curves, simply add a two Curves adjustment layers. One will be for the LIGHTER (Dodge) Curve and the other for the DARKER (Burn) curve. In the example below, the NUMBER 1 ARROW is pointing at the curve point that is used to adjust the BRIGHTNESS in this case since this is the DODGE Layer. The NUMBER 2 Arrow is pointing to this Curve Layer with the Black Mask attached to it. Painting white on that layer mask will reveal the adjustment to the pixels in that area of the image.
Adjustment layers are the heart of Photoshop and it is where all the flexibility and power come into play. Curves adjustments are great for both tonal adjustments as well as color editing. To dodge and burn using Curves, simply add a two Curves adjustment layers. One will be for the LIGHTER (Dodge) Curve and the other for the DARKER (Burn) curve. In the example below, the NUMBER 1 ARROW is pointing at the curve point that is used to adjust the BRIGHTNESS in this case since this is the DODGE Layer. The NUMBER 2 Arrow is pointing to this Curve Layer with the Black Mask attached to it. Painting white on that layer mask will reveal the adjustment to the pixels in that area of the image.
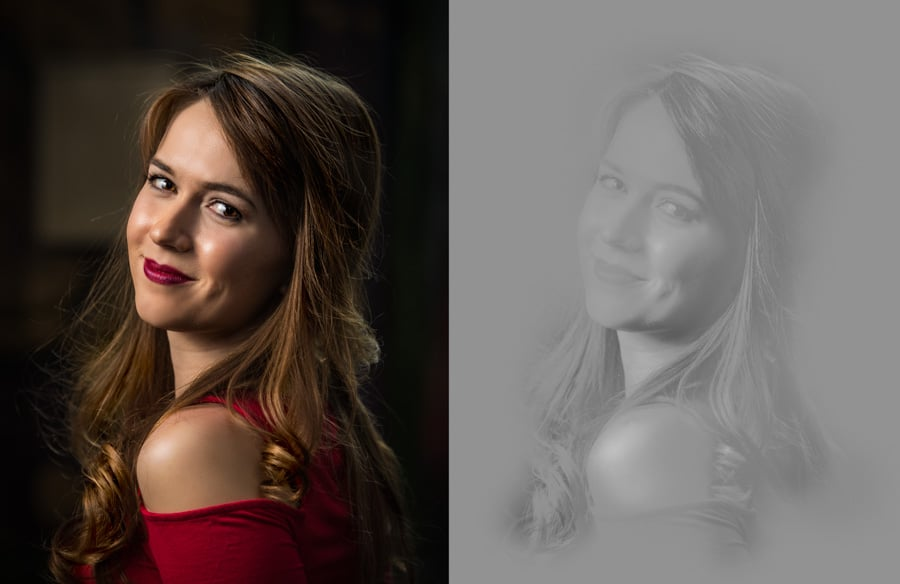
Dodge & Burn with 50% Gray Layer(s)
Another popular method to Dodge and Burn is using Blank Layers filled in with 50% grey and then these layers are changed to either Soft Light or Overlay Blend Modes. With these two blend modes and 50% grey filling them, they appear as totally transparent layers as if nothing has been altered in your image. Choosing Overlay or Soft Light as the blend mode really is personal preference as some like the more punchy effect you get from Overlay Mode and others like the more subtle Soft Light Mode. Personally, I (along with many others) prefer to use Overlay for the DODGE layer and SOFT LIGHT for the burn layer. Experiment with different images since every image is a whole new canvas to create your vision upon.
Another popular method to Dodge and Burn is using Blank Layers filled in with 50% grey and then these layers are changed to either Soft Light or Overlay Blend Modes. With these two blend modes and 50% grey filling them, they appear as totally transparent layers as if nothing has been altered in your image. Choosing Overlay or Soft Light as the blend mode really is personal preference as some like the more punchy effect you get from Overlay Mode and others like the more subtle Soft Light Mode. Personally, I (along with many others) prefer to use Overlay for the DODGE layer and SOFT LIGHT for the burn layer. Experiment with different images since every image is a whole new canvas to create your vision upon.