Dji Pocket 2 Review
INTRODUCTION
Hello again, now it's time to talk you a little bit of a tool, for me it's one of the most important on my photo trips, i usualy make videos to document all the steps of my foreign journeys and this the first Pocket Cam, became one of my favourite gadget, but in first Pocket generation i think, a lot of things could be improved.
The first one was the DJI Osmo Pocket was a very unique product when it was released, and something we hadn’t seen before. DJI has listened to customer feedback and made improvements based on that feedback. The first one was lanched in 2018, Dji launched the first Pocket, and as usal by Dji brand after two years, it launches the successor, and he we are in 2020 to talk you about Dji Pocket 2.
FROM THE AIR TO THE GROUND
Like the original Osmo Pocket, the Pocket 2 is quite literally a drone camera that has been attached to a handle. Just like the original Osmo and the Osmo Pocket, DJI has leveraged its drone technology to create the Pocket 2. The original Mavic Pro and subsequent Mavic models really were an engineering marvel, given their capabilities and small size. The Pocket 2 follows this same philosophy of miniaturizing tech and making a product that is as small as possible. But has DJI done enough of an upgrade with the Pocket 2, or is it too similar to its predecessor.
ABOUT DJI
DJI was founded in 2006 by Frank Wang, a mainland-born student at Hong Kong University of Science and Technology. A model plane enthusiast, Wang started the company with the clear goal of making a flying toy that wouldn’t crash half the time. Instead of working out of a dorm room, Wang and two classmates rented a tiny office in Shenzhen just across the border. For several months, he skipped classes and poured all his energy into building his dream. At first, the company focused on making drone parts such as autopilot systems and gimbals. But their sights were set on building a complete drone that was ready to fly right out of the box.
DJI’s first mass market hit, the Phantom, arrived in 2013. It sold for less than 600€ (minus the camera) but brought serious hardware, setting it far above the flimsy toy helicopters already on the market.
While competitors were playing catch-up, DJI kept improving the Phantom, increasing flight time from around 10 minutes for the original to 28 minutes, adding a built-in camera to the drone and a screen to the remote.
DJI also turned to other segments of the market, building expensive drones for professional users, while churning out smaller and smarter models for hobbyists. Following the success of the Phantom series, the company launched the foldable Mavic Pro in 2016 and the Spark in 2017. The latter is DJI’s smallest drone to date, approximately the size of a soda can.
GLOBAL DOMINANCE
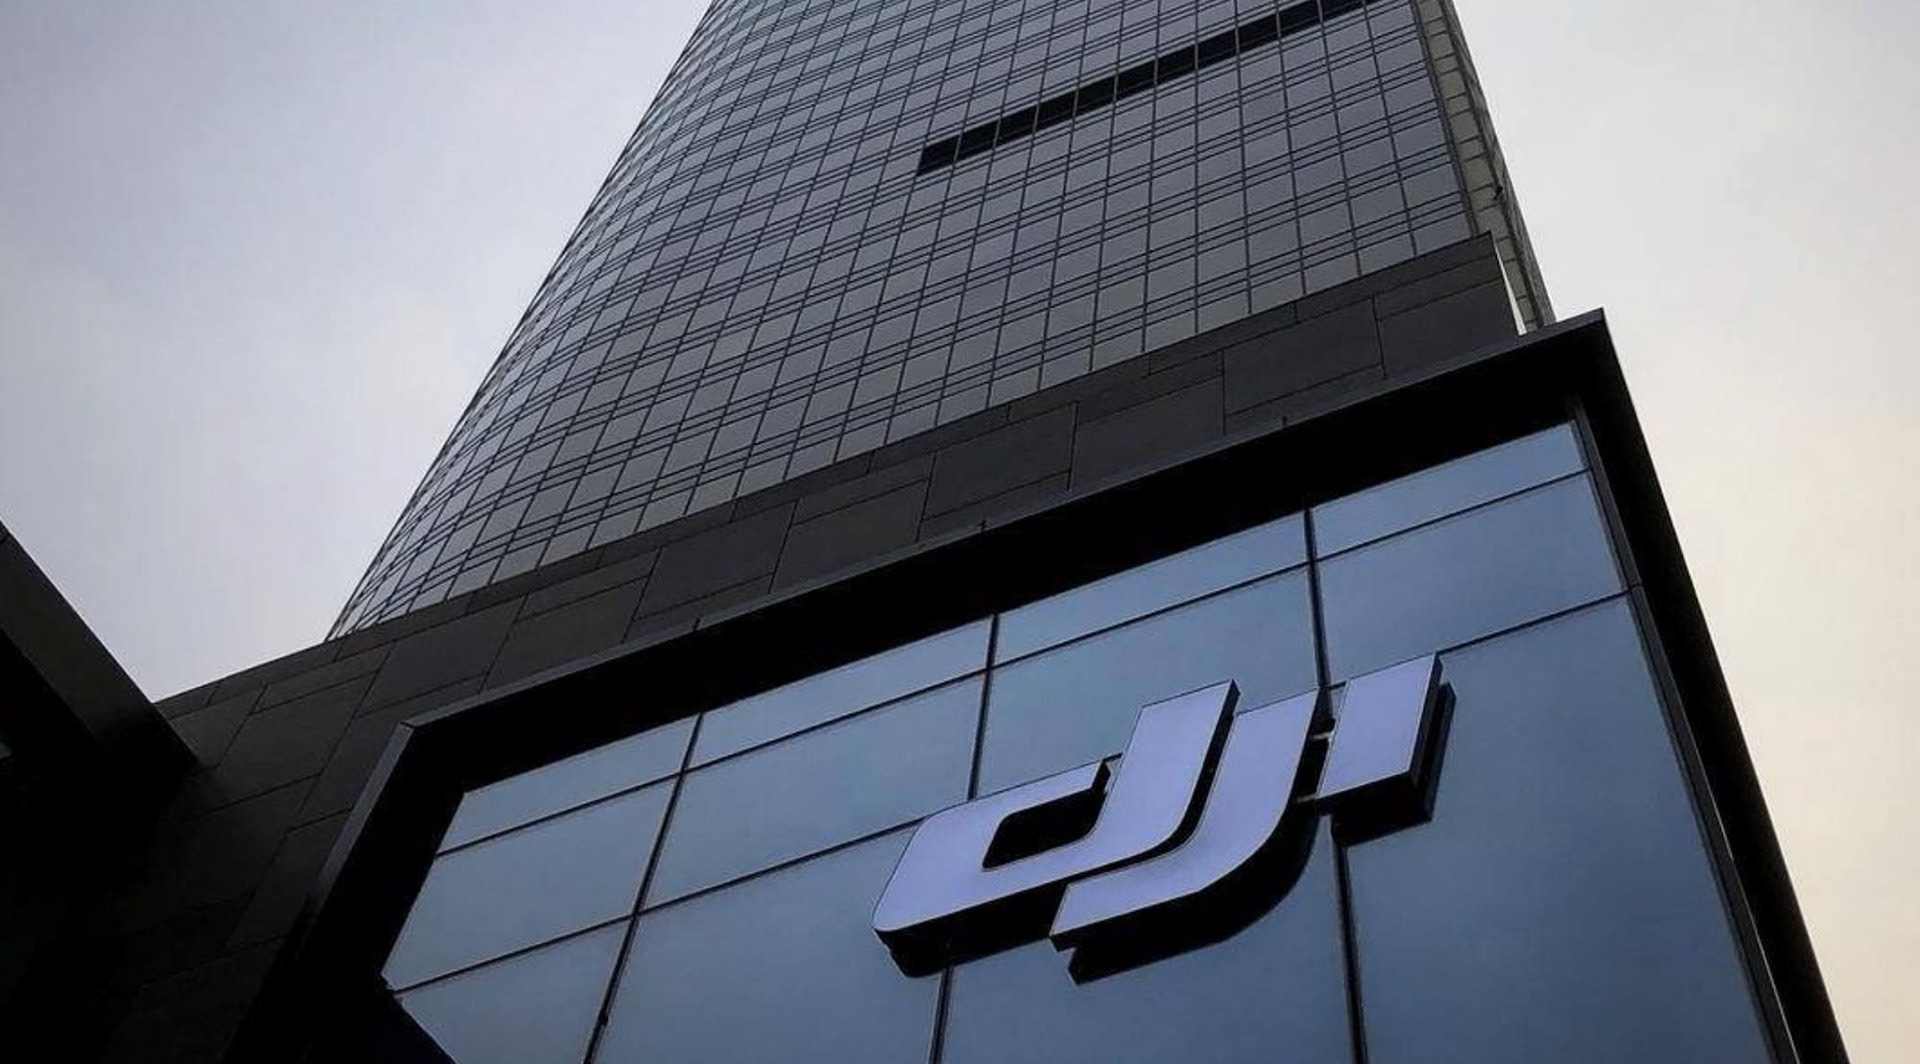
Dji Headquartered are in Shenzhen, widely considered China’s Silicon Valley, DJI benefits from direct access to the suppliers, raw materials, and young, creative talent pool necessary for sustained success. Drawing on these resources, they have grown from a single small office in 2006 to a global workforce. Their offices can now be found in the United States, Germany, the Netherlands, Japan, South Korea, Beijing, Shanghai, and Hong Kong. As a privately owned and operated company, DJI focused on our own vision, supporting creative, commercial, and nonprofit applications of our technology. Today, DJI products are redefining industries. Professionals in filmmaking, agriculture, conservation, search and rescue, energy infrastructure, and more trust DJI to bring new perspectives to their work and help them accomplish feats safer, faster, and with greater efficiency than ever before.
Dji Headquartered are in Shenzhen, widely considered China’s Silicon Valley, DJI benefits from direct access to the suppliers, raw materials, and young, creative talent pool necessary for sustained success. Drawing on these resources, they have grown from a single small office in 2006 to a global workforce. Their offices can now be found in the United States, Germany, the Netherlands, Japan, South Korea, Beijing, Shanghai, and Hong Kong. As a privately owned and operated company, DJI focused on our own vision, supporting creative, commercial, and nonprofit applications of our technology. Today, DJI products are redefining industries. Professionals in filmmaking, agriculture, conservation, search and rescue, energy infrastructure, and more trust DJI to bring new perspectives to their work and help them accomplish feats safer, faster, and with greater efficiency than ever before.
PACKAGING AND UNBOXING
The Pocket 2 came with a beatifull and smooth box. After opening we can find this inside the package:
- Pocket 2
- Cover
- Wrist Strap
- Limited Warranty for Camera,Handle, Charger, and Limited Warranty for Battery
Small box with:
- USB Type-C Smartphone Adapter
- Lightning (iOS) Smartphone Adapter
- Charging Cable
- Mini Control Stick
1/4"-20 Tripod Mount
- Pocket 2
- Cover
- Wrist Strap
- Limited Warranty for Camera,Handle, Charger, and Limited Warranty for Battery
Small box with:
- USB Type-C Smartphone Adapter
- Lightning (iOS) Smartphone Adapter
- Charging Cable
- Mini Control Stick
1/4"-20 Tripod Mount
DESCRIPTION
The DJI Pocket 2 it's all-in-one camera with a built-in three-axis stabilizer.
Offering numerous upgrades over its predecessor, the DJI Pocket 2 Gimbal adds a 1/1.7" 64MP CMOS sensor, up to 8x zoom, a 93° angle of view, and four directional stereo microphones with DJI Matrix Stereo audio zoom, utilizing its lightweight, ultra-compact 3-axis gimbal stabilizer and 4K camera combination. New software enhancements have also been added, including an updated ActiveTrack 3.0, built-in glamour effects, an AI editor, Hybrid AF 2.0, and motion-lapse, without the need for the smartphone app. It's got everything you need for a high-resolution mobile production to create family videos, add footage to your photo shoots, or vlog your latest streaming creations with smooth motion video.
Weighing just over four ounces, this all-in-one unit features a 3-axis gimbal stabilizer for smooth movement and easy pan-and-tilt control. The Pocket 2 incorporates a 1/1.7" sensor and a wide 20mm, 93° angle-of-view lens to record up to cinematic 4K60 video at 100 Mb/s and 64MP still photos onto a microSD card up to 256GB in capacity. The four microphones allow you to capture enhanced stereo audio, and they feature noise reduction and a zoom function that follows the zoom of your camera to capture enhanced audio in a tighter shot. The camera can utilize 8x zoom for stills, 4x zoom for 1080p video and audio, 3x zoom for 2K video, and 2x zoom for 4K video.
Use DJI's Mimo app and your iOS or Android smartphone to polish your footage with preset shooting patterns, camera motions, filters, and soundtracks. The app isn't even required to add glamour effects and to do basic editing, and you can even set it to motion-lapse with a single touch. You can also live stream your video to the web using the app. Unlike a similarly sized smartphone, the candy bar-sized Pocket 2 offers intelligent functions like Story Mode, Active Track 3.0, hyper-lapse, panorama, and motion-lapse to create compelling creative effects. Choose between 180° and 3 x 3 panoramic shots to capture wide landscape vistas.
The Pocket 2 has a passive cooling system that quietly dissipates heat, and a rechargeable battery enables the camera to record up to 140 minutes. Included in the box are a cover, a mini control stick, a 1/4"-20 tripod mount, a wrist strap, a power cable, and USB Type-C and Lightning smartphone adapters. Additional accessories such as a wide-angle lens, "Do-it-All" handle, USB splitter, tripod, wireless microphone transmitter, charging case, phone clip, and waterproof case are available separately to round out your Pocket 2 experience.
The camera remains incredibly easy to use and is a great option for vloggers and content-creators who need to capture stabilized video and don’t want to be weighed down with lots of gear.
SPECIFICATIONS
CAMERA
Sensor - Chip 1/1.7" CMOS
Sensor Resolution - 64 MP
Effective Pixels - 64 MP (Photo)
OPTICS
Focal Length - 20mm
Maximum Aperture - f/1.8
Fixed Focus- No
Angle of ViewWide - 93°
RECORDING
Recording Media - 1 x microSD (256 GB Maximum)
Video Format - 3840 x 2160p at 24/25/30/48/50/60 fps (100 Mb/s MP4 via H.264/AVC, MPEG-4)
2720 x 1530p at 24/25/30/48/50/60 fps (100 Mb/s H.264/AVC, MPEG-4)
1920 x 1080p at 24/25/30/48/60 fps (100 Mb/s MP4 via H.264/AVC, MPEG-4)
2720 x 1530p at 24/25/30/48/50/60 fps (100 Mb/s H.264/AVC, MPEG-4)
1920 x 1080p at 24/25/30/48/60 fps (100 Mb/s MP4 via H.264/AVC, MPEG-4)
Aspect Ratio - 16:9
Slow Motion Mode - 240 fps Recorded at 1920 x 1080p
120 fps Recorded at 1920 x 1080p
120 fps Recorded at 1920 x 1080p
Still Image Support - DNG / JPEG - 64 MP (9216 x 6912)
Channels4.0 - Channel Stereo
Audio Format - AAC
Sampling FrequencyAAC - 48.0 kHz
IP Streaming - None
DISPLAY
Display Type - Fixed LCD
Secondary Display - None
EXPOSURE CONTROL
Shutter Speed - 1/8000 Seconds (Photo, Video)
Photo ISO Range - 100 to 6400
Video ISO Range - 100 to 6400
Shooting Modes - HDR
Panorama
Self Portrait
Time Lapse Movie
Remote Control - None
FEATURES
Image Stabilization - Digital
Scene ModesPreset - YesCustom: Yes
Creative Effects - Yes
Built-In Mic - Yes
Built-In Speaker - No
Built-In Light/FlashLight - No
Flash - No
Wi-Fi - Yes (With acessory Do-It-All)
Bluetooth - Not Specified by Manufacturer
Accessory Shoe - None
Tripod Mount 1/4"
INPUT/OUTPUT CONNECTORS
Inputs - 1 x USB 2.0 Type-C Charging
Outputs - 1 x USB 2.0 Type-C Monitoring
Video Output - None
Microphone Input - None ( Wirless Mic)
Headphone Jack - None
GENERAL
Battery - Rechargeable Lithium-Ion Polymer Battery Pack, 7.7-8.8 VDC, 875 mAh
Charging Method - USB
Charging Time - 1.25 Hours
Power Adapter - 5 VDC
Power Consumption Operating - 6.738 W
Operating Temperature - 32 to 104°F / 0 to 40°C
Dimensions - 124.7 x 38.1 x 30.0 mm
Weight - 117 g
PACKAGING INFO
Package Weight - 260 g
Box Dimensions: 18 x 4.8 x 3.8 mm
INTERFACE
The buttons and layout of the Pocket 2 are simple and straightforward. With this device being aimed at a large consumer market, DJI needed to design the Pocket 2 to be easy to use and operate.
There are only two buttons on the Pocket 2, a record button and a multi-purpose button that acts as the power on/off, menu button and as a function button when you are shooting. There is also a kind of locking hot shoe style interface where the lightning connector, USB-C connector, and accessories can be attached. Speaking of locking connectors, if you don’t have a phone that uses a lightning or USB-C port then you won’t be able to attach your phone to the Pocket 2. The only way of using a phone that doesn’t have a lightning or USB-C interface would be to use the optional DJI wireless module.
When you are shooting the multi-purpose button does three things:
One press – A single press of the button toggles between Video and stills mode.
Two presses – By pressing the button twice, you recenter the gimbal and camera.
Three presses – By pressing the button 3 times, you flip the gimbal into selfie mode. If you press it three times again it will spin back into its original position.
With the Pluggin Joystick inserted you can:
In the Button
One Press - A single press of the button toggles between Folow modes
Two Press - By pressing the button twice, you can choose what you want to do in joystick, there's 2 possible options, control de Pan/Tilt or control de Zoom
At the bottom of the gimbal, there is a USB interface for charging. removing the cover, we can take others extras that the osmo have, the tripe base, the Do-it-All Handle
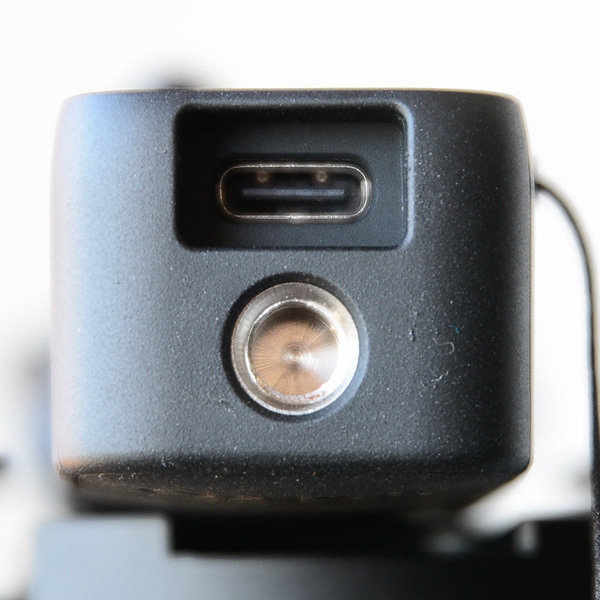
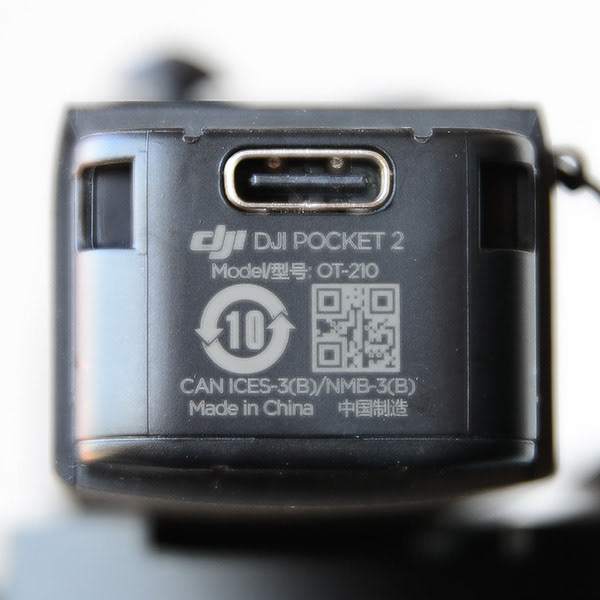
On the side, there is the slot for the Micro SD card.
On the other side theres's the On/Off Button, the socket to place the Wrist Strap
PERFORMANCE
SCREEN
The gimbal camera uses a 1-inch integrated touch screen that is reasonable quality and can act as a live view as well as allowing you to toggle through the various shooting modes, adjust settings, and review your footage.
Speaking of the touchscreen, it is very responsive to the touch and easy to use. DJI has done a nice job with the interface on such a tiny screen.
t’s very easy to get out of the menu system, all you need to do is press one button.
If you have made manual settings with a smartphone attached and then you disconnect your phone, the Pocket 2 will keep those same settings.
BATTERY
The Pocket 2 uses a built-in LiPo 875 mAh battery. This can’t be replaced or removed. DJI quote an operating time of 140 mins when shooting 1080p 30 fps video continuously and a charging time of 73 mins.
Yes, it’s a pity the Pocket 2 doesn’t have a removable battery that you can swap out, but the good news is that the battery charges up really quickly. I was finding that it took just over an hour for a completely dead battery to get charged up to full capacity.
I found the battery life to be more than acceptable if you are just going to use the Pocket for a few hours or a handful of shots. If you are taking it somewhere remote or you want to shoot with it for a whole day then you will need to get hold of a USB power bank.
The nice thing is, you can actually charge and operate the Pocket 2 at the same time. If you have a USB power bank it’s pretty easy to just plug it in and use it with the Pocket. I recommend you use a long cable and perhaps place the USB power bank in your pocket because you can’t really attach it to the Pocket or your phone.
ACTIVETRACK – Just like on some of the DJI drones, you can track an object or a person by simply drawing a box on the screen. This can be done on a smartphone using the app. or you can select object tracking on the Pocket 2’s touch screen, by double-tapping, but you can’t draw a box around anything.
The ActiveTrack function is available in most of the shooting modes (including slo-mo). It won’t work when shooting UHD 50 or 60p.
WORKING
The main screen, is the place where operate's the Pocket swaping to the sides, this is how it runs:
SWIPE DOWN
First Icon - if You are using the Mini Control Stick, is the icon where you can choose what it do, Pan/Tilt or Zoom.
Second Icon - is the settings icon where you can choose:
- Full screen Mode,
- The storage capacity,
- The selfie mode,
- Accessories configuration,
- Gimbal Calibration,
- Anti-Flicker mode,
- Key tone,
- More Icon, in more icon you can choose the language, reset you device, and see you device info.
In The Settings Options sliding to the left, apear, the Glammour Effects options, sliding again to the left apear the Quality mode in the Photos 64MP or 16MP, in videos Battery saver or High Quality, sliding again to the left apear the icon where you can choose the PRO mode.
PRO MODE
When you set the Pocket 2 in PRO mode you can choose between full manual control or Auto control.
Now you either have PRO turned On or Off. When it is off, you are basically in a default auto mode where your ISO and Shutter speed are changed automatically. The only thing you can manually adjust is the brightness slider, but even if you do adjust it, the ISO and shutter speed will automatically adjust to compensate.
I found that the non PRO mode worked ok in nice even lighting conditions, but it does struggle in high contrast or high dynamic environments. The auto exposure does take a bit of time to adjust (although it does do it quite smoothly). Just like the exposure, the AFC (Auto focus continual) works ok if you are in nice even lighting situations, but as soon as you try to use it in contrasty conditions it starts to struggle and is very slow at making adjustments.
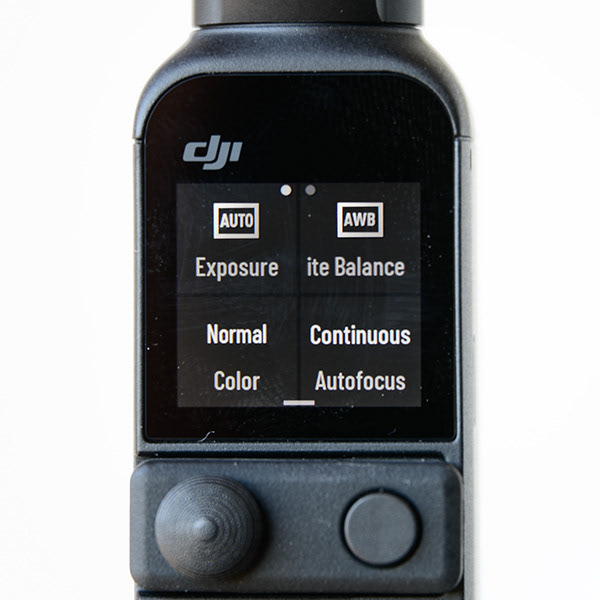
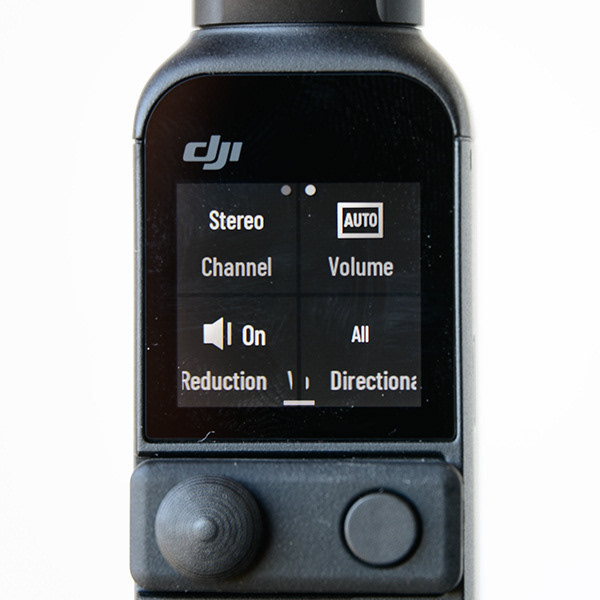
Clicking in top left corner in main screen in Pro icon goes to a Menu where you can choose:
- The Exposure,
- The White Balance,
- The Color mode, Normal or DClike,
- The Autofocus mode,
- Stereo or Mono Mode,
- The Volume Values, Auto or 3 modes,
- The Wind Noise Reduction Mode,
- The Direction of the Microphones.
PICTURE ADJUSTMENTS, PROFILES AND D-CINELIKE
D-CINELIKE – There are no picture profiles available on the Pocket 2 and no D-Log. The only option you have is Normal or D-Cinelike. There is also no way of changing sharpness, saturation, or contrast. Basically what you see is what you get. It would have been nice to have had the ability to change the image parameters, but at the end of the day this is a consumer product, so it’s not a massive surprise to me that DJI didn’t include any of these features.
WHITE BALANCE – You can choose from either Auto, or Custom white balances on the Pocket 2 itself.
I found that the auto white balance did a pretty good job unless you were in mixed lighting conditions. When using the custom white balance setting I still found that the white balance never quite looked right to my eye. Without being able to do a physical white balance the colors you will get will always be slightly off. Again, in nice even normal lighting conditions it’s fine, but as soon as you get into mixed lighting it does struggle.
ANTI-FLICKER – Anti Flicker is a setting that you should check if you are in a room with fluorescent lights or you plan on shooting a television screen. Often when using a camera in these environments, there is a noticeable flicker in the image. This setting helps reduce flicker. There is a setting where you can choose to select either 50 or 60Hz, but you can only change this in the Auto shooting mode. In the manual shooting mode, it defaults to whatever frame rate you have chosen to use. It’s strange that you can’t change it in the manual shooting mode as if you want to shoot in say 25p in a country that is 60Hz, you can’t change the anti-flicker to 60Hz, it will be stuck on 50Hz.
POCKET 2 AUDIO – DJI has completely redesigned the audio system on the Pocket 2. Let’s face it, the original Osmo Pocket’s audio was pretty horrible. The newly added DJI Matrix Stereo system consists of four microphones, that have been placed in positions that are not obscured when you are holding onto the Pocket 2. It also means the audio now gets picked up in the same direction that the Pocket 2 is facing.
Directional Audio is claimed to enhance sound recording from the microphones to pick up as much detail as possible, with SoundTrack adjusting the audio based on where the camera is facing. Audio Zoom narrows the sound field when zooming the camera in. To further filter out unwanted background sounds, there is an optional wind noise reduction.
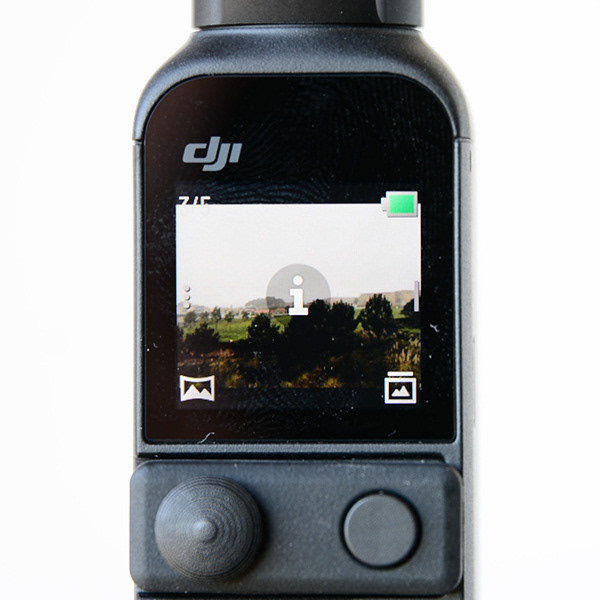
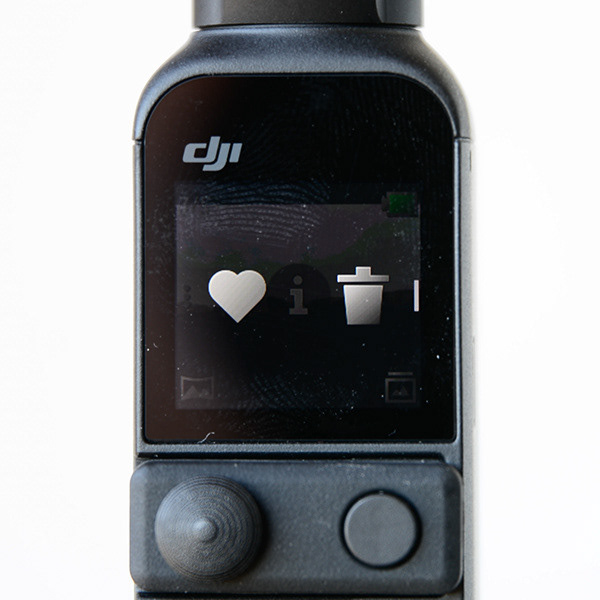
SWIPE RIGHT – This goes into playback mode so you can view your clips sliding up an down , and where you can rate and erase them.
SWIPE UP – This goes into your gimbal control mode:
– Recenter the gimbal,
– Flip the gimbal into selfie mode,
– Change from slow follow to fast follow (or vice versa),
– Change between tilt lock, FPV, and Follow modes. What I like is when you press on the icons it tells you exactly what they are.
SWIPE LEFT – This gets you into your shooting modes where you can choose sliding up and down from Photo, Video, Slow-Mo, Timelapse, and Pano.
SHOOTING MODES
Sliding to shooting mode you want, you have a sub menu slidind to the left where you have that mode options.
Panoramic – This is the option to make panoramic photos, it can be made in 3x3 or 180ª, it also have the possibility to choose a timer countdown.
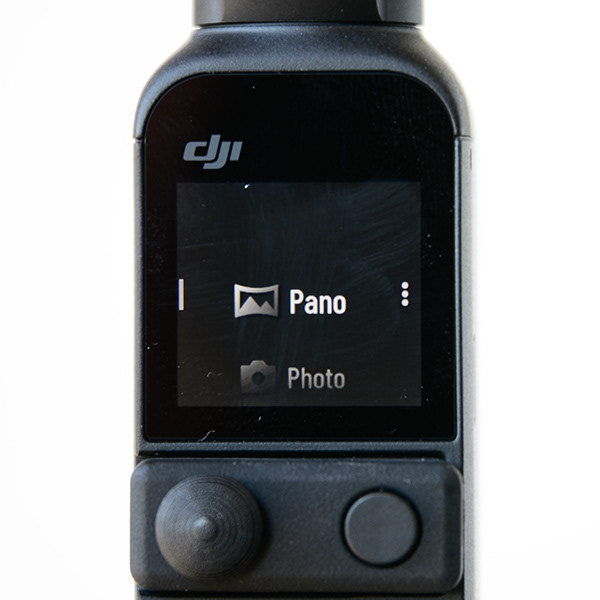
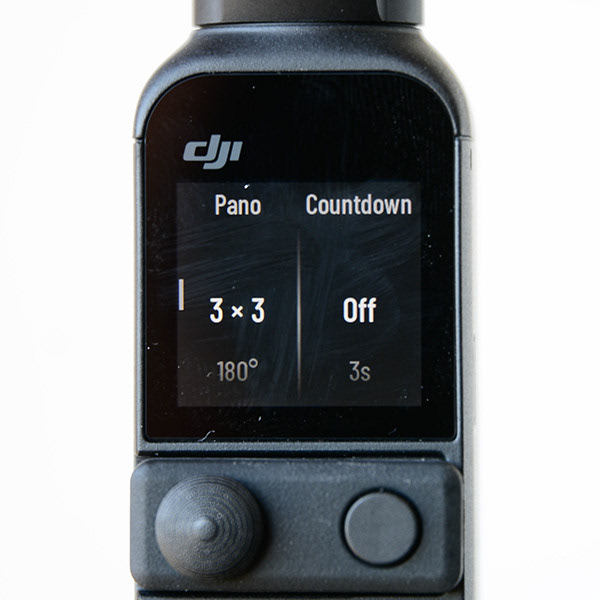
Photo – This is the option to make Photography, it can be made in 4:3 or 19:9 Ratio, it also have the possibility to choose a timer countdown.
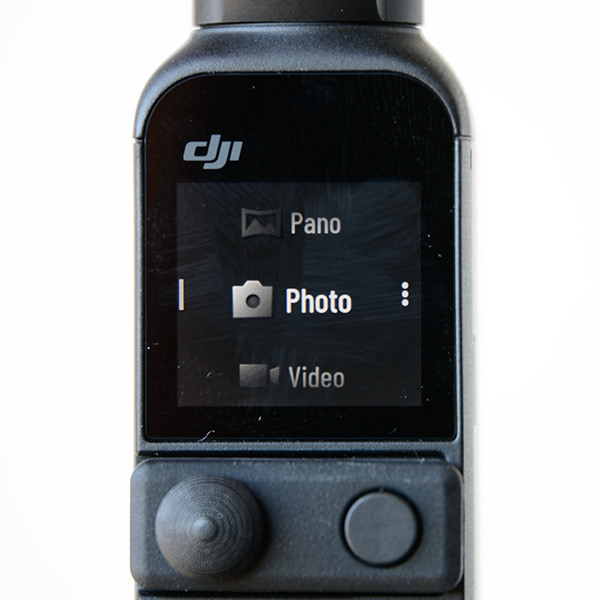
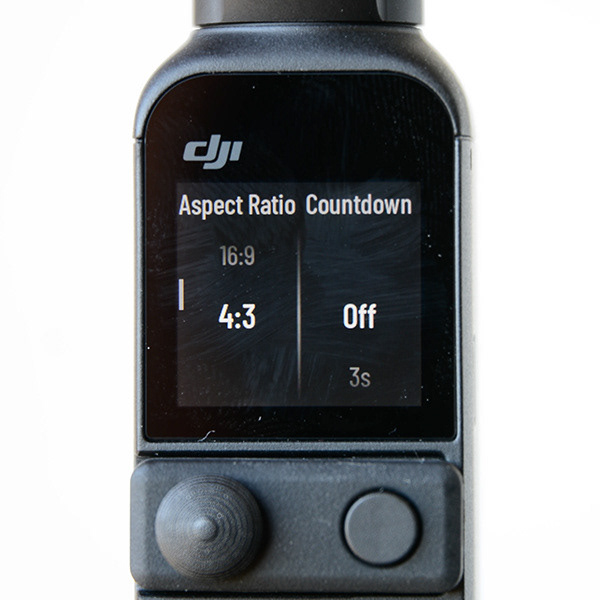
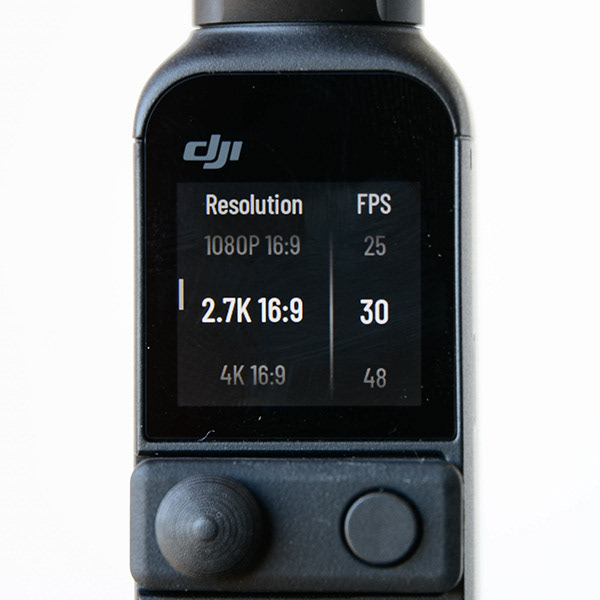
Video – This is the option to make Video, and it can choose the resolution in the left column, and Frame per Second on right column.
- 3840 x 2160p at 24/25/30/48/50/60 fps (100 Mb/s MP4 via H.264/AVC, MPEG-4)
- 2720 x 1530p at 24/25/30/48/50/60 fps (100 Mb/s H.264/AVC, MPEG-4)
- 1920 x 1080p at 24/25/30/48/60 fps (100 Mb/s MP4 via H.264/AVC, MPEG-4)
- 2720 x 1530p at 24/25/30/48/50/60 fps (100 Mb/s H.264/AVC, MPEG-4)
- 1920 x 1080p at 24/25/30/48/60 fps (100 Mb/s MP4 via H.264/AVC, MPEG-4)
All 16:9 Ratio
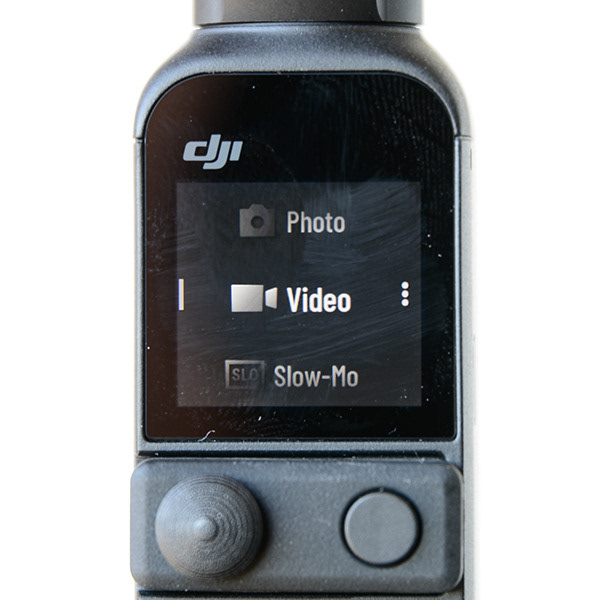
Slow Motion – Capture the fast-moving in slow motion with a max speed, and it can choose the resolution in the left column, and Speed on right column.
- 240 fps Recorded at 1920 x 1080p
- 120 fps Recorded at 1920 x 1080p
- 120 fps Recorded at 1920 x 1080p
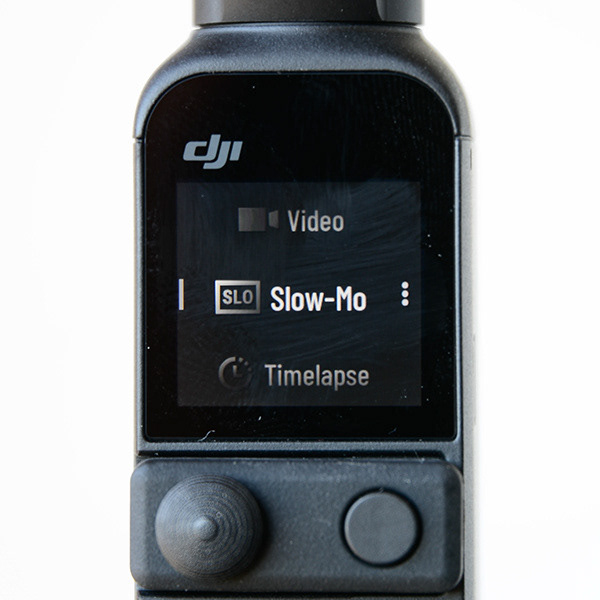
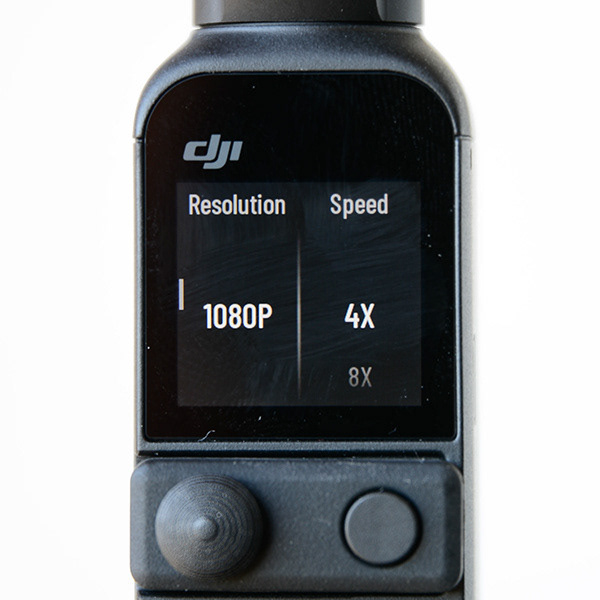
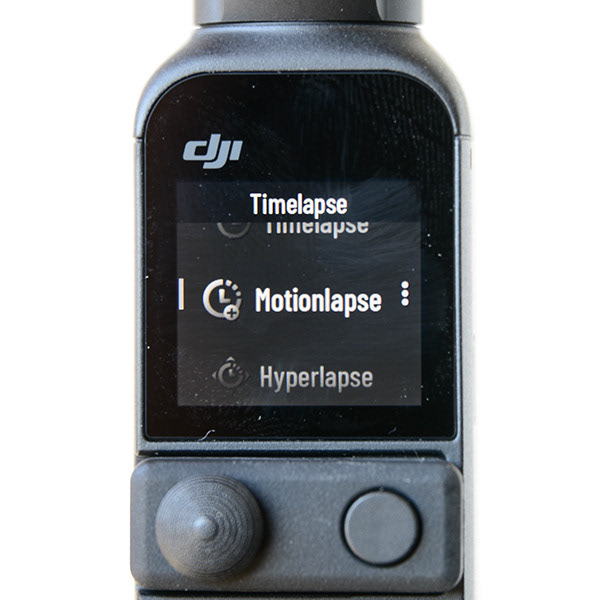
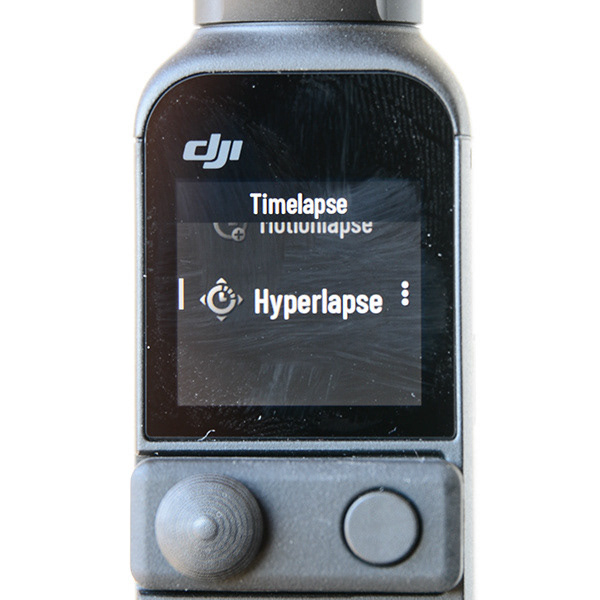
1- Timelapse – Here you can make Timelapse mode, sliding to the left you have 3 modes: Timelapse, Hypelapse, and Motionlapse. Speed up the world around you with the varying effects of three different time-lapse operations...
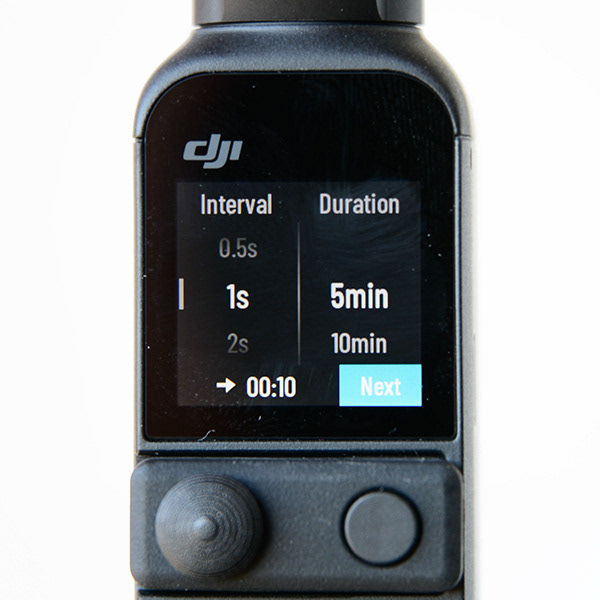
1.1 -Timelapse – in this option you can make a timelpase without moving, and it can choose the Interval in the left column, and Duration on right column.
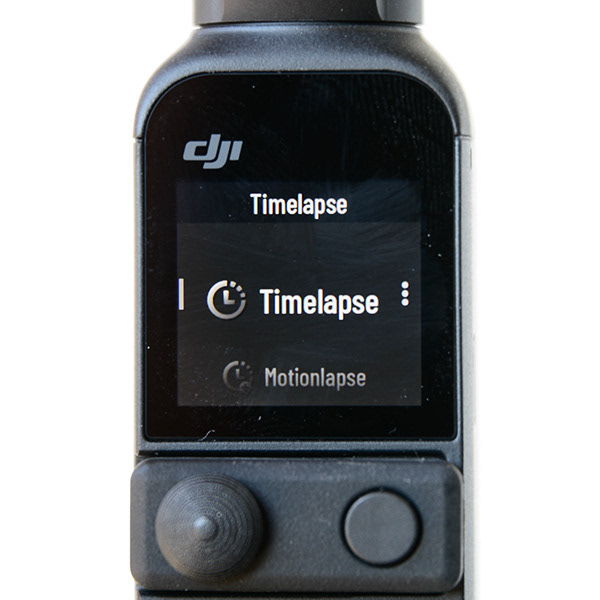
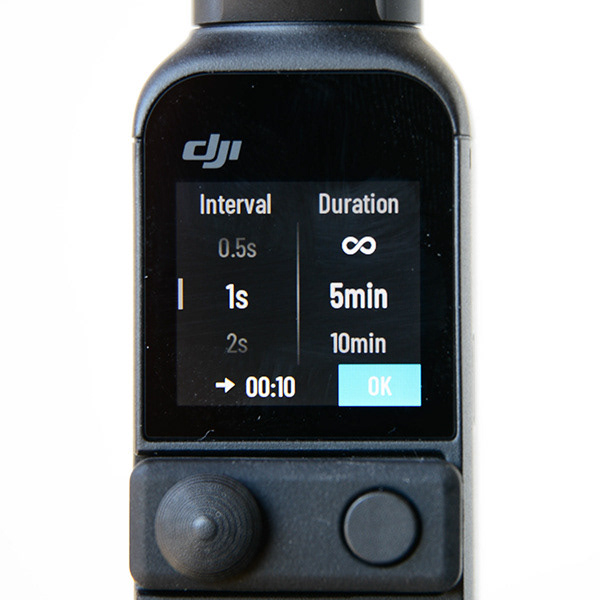
1.2- Motionlapse – In this mode you can make timelapse using only the pan mode, Right to Left, or Left to Right, inside this to options sliding to left you can choose the Interval in the left column, and Duration on right column.
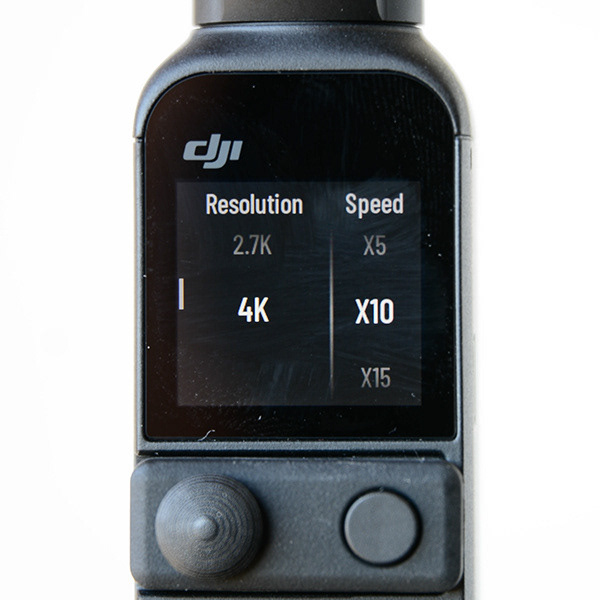
1.3- Hyperlapse, In this mode you can make timelapse using the pan mode and the tilt mode, free movement, i avise you to make this mode in the mimo app on phone, there you can set the begining, more 2 places and a four and end place.
Hyperlapse automatically integrates Electronic Image Stabilization (EIS) for added smoothness. Users have the ability to save individual images separately, record in RAW format, and use ActiveTrack 3.0.
DJI POCKET 2 IMAGE QUALITY
The actual video quality really depends on what you are doing with the Pocket 2. It’s fairly decent in controlled conditions, but it struggles in certain shooting scenarios. This is very similar to using a smartphone or action camera.
Proper digital cinema cameras and some mirrorless hybrids will perform well in mixed lighting conditions, high dynamic range scenes, and shooting scenarios that aren’t perfect. Any camera can look good in nice even light or controlled conditions and it’s hard to pick a cheap camera from an expensive one. Where cheaper cameras fall over is in difficult conditions that aren’t controlled or when you using them in mixed lighting.
This is exactly the case with the Pocket 2. The footage looks pretty good in nice even light, and scenes without a lot of dynamic range. As soon as you try and use the camera in mixed lighting, high dynamic range scenes, or where there is a strong light source, it tends to struggle. That’s not to say the image becomes unusable, but you do need to know this camera’s limitations.
If you are just going to grab the Pocket 2 and start shooting in the Auto settings you can still get decent results in the right conditions. Above you can see untouched material that was shot in UHD 25p with everything set to auto. I purposely wanted to see how the Pocket 2 looked when shooting in difficult lighting conditions when everything was set to Auto. The Pocket 2 actually did a pretty good job with keeping exposure reasonably accurate and the auto white balance worked well. The Pocket 2 did struggle with maintaining highlight detail, but in saying that, I was purposely putting it into a difficult environment.
With only D-Cinelike available and a low bitrate codec, you really do need to shoot in a way that is going to very close to how you want your final image to look. As I mentioned earlier it’s a 4:2:0 code that has a fairly low bitrate unless you are shooting in UHD 60p. You can’t go pushing it or trying to correct issues in your edit. There is also no way of adjusting sharpness, contrast, or saturation so the images you get do look overly sharp in a lot of situations.
USABILITY
This is probably the camera’s biggest selling point. Its tiny size and weight mean it can be literally kept in your pocket and you can just pull it out and use it at any time. This convenience factor makes the Pocket 2 a useful product to have.
The usability of the Pocket 2 if you don’t want to connect it to your smartphone and use the app is quite limiting. You really do need to use a smartphone and the app to get the best results out of the Pocket 2.
The app is simple and easy to use and being able to hook up a large, bright screen to it certainly helps with composition, framing, and getting proper exposure and focus. This is something that can’t easily be done with just the Pocket 2 alone.
The only problem with using a smartphone is that all of the weight is being supported by the lightning or USB-C connector. This means that quite often both devices (your phone and the pocket) are wiggling around slightly. This causes your gimbal shots to not be as smooth as they could be. You really do need to hold both the Pocket 2 and your phone at the same time.
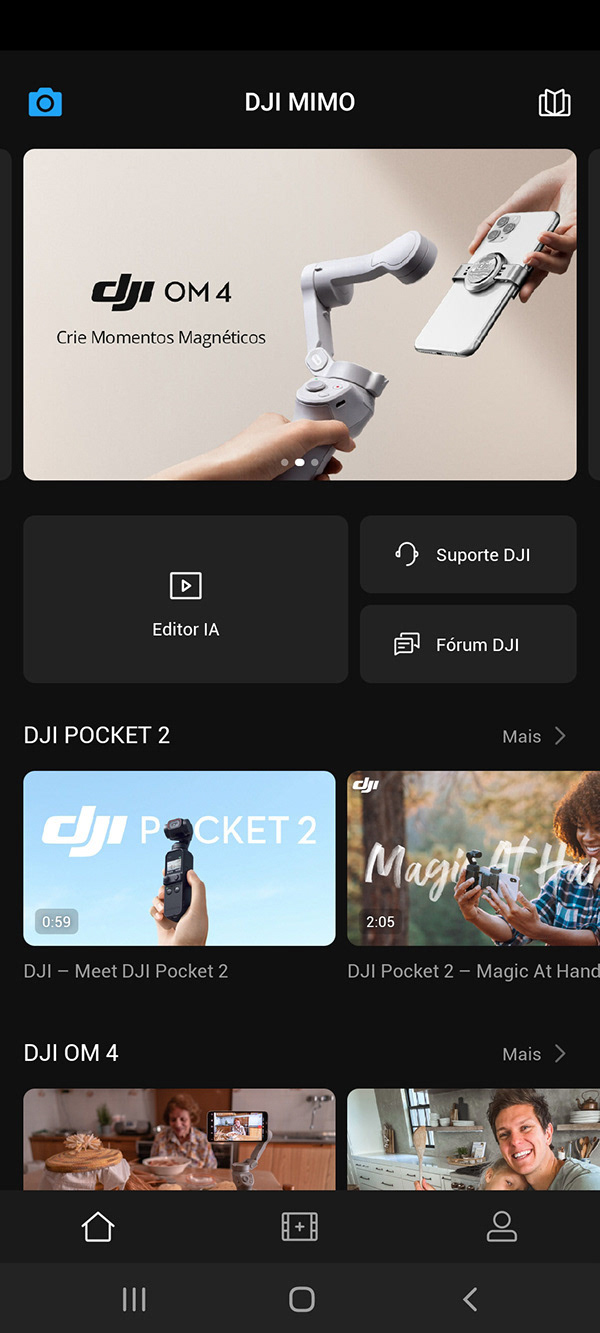
DJI MIMO APP
To get the most out of the Pocket 2 you really do need to use the Mimo app and a smartphone.
The Mimo app lets you monitor the Pocket’s image in real-time as well as control all of its functionality and features. The only downside to using the app is you have to connect your smartphone to the Pocket, which takes away from the compact nature of the product.
Ideally, I think the best solution is to probably get the optional Wireless Module. That way you can connect via Bluetooth and make changes and monitor on your smartphone while maintaining the small footprint that the Pocket has. It’s strange that the Bluetooth wasn’t built into the Pocket, maybe they just ran out of room, or they just want to you spend more money by buying additional accessories.
FOLLOW MODES
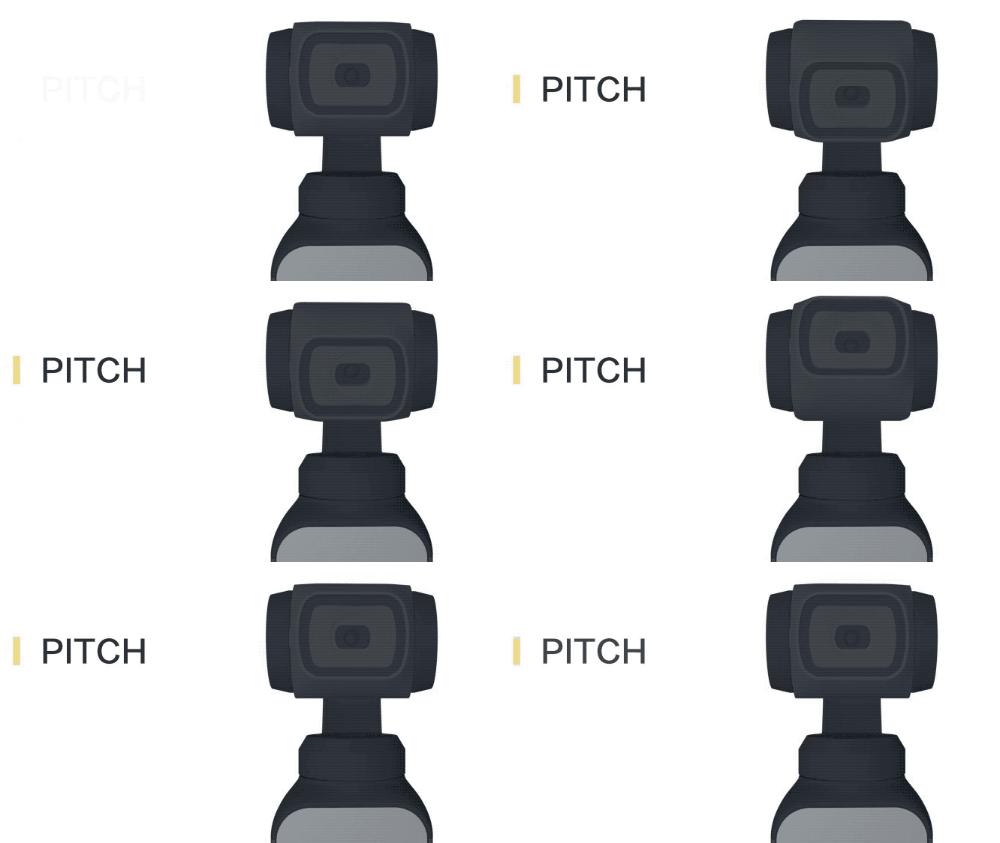
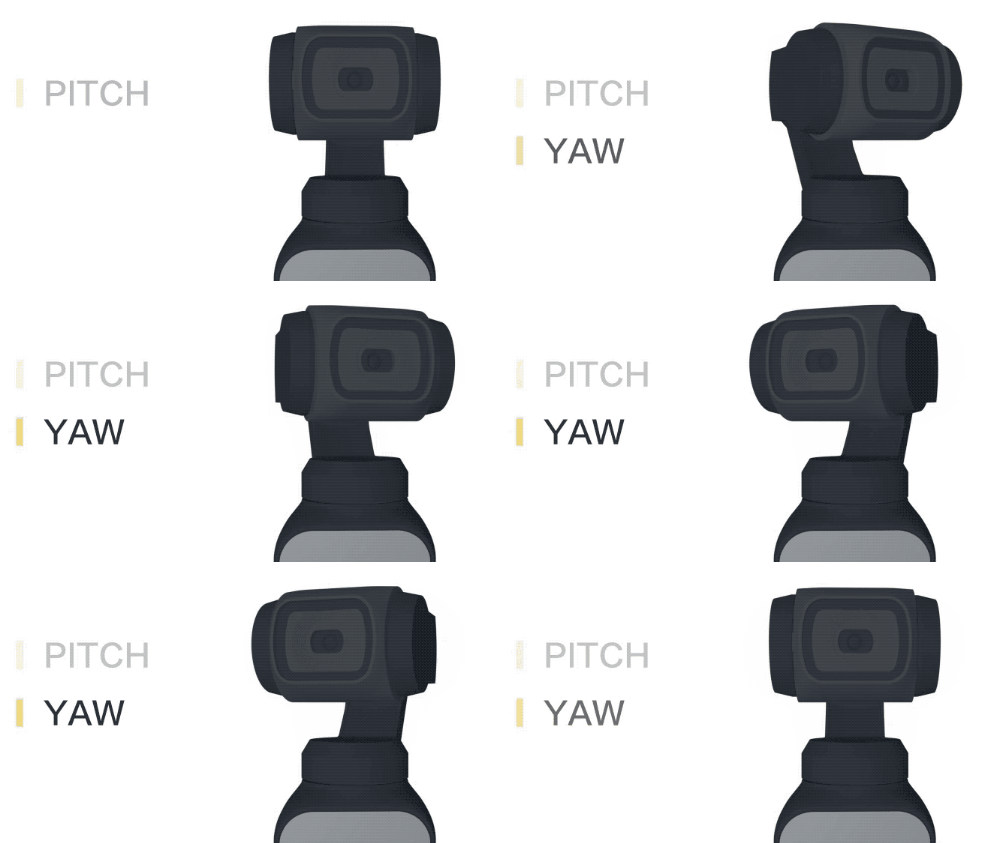
Osmo Pocket offers three gimbal modes: Follow, Tilt Locked and FPV. Many beginners only know how to power on and start shooting immediately; many have no idea how to set up the gimbal modes depending on the shooting scenario. This article will introduce the differences between the three gimbal modes.
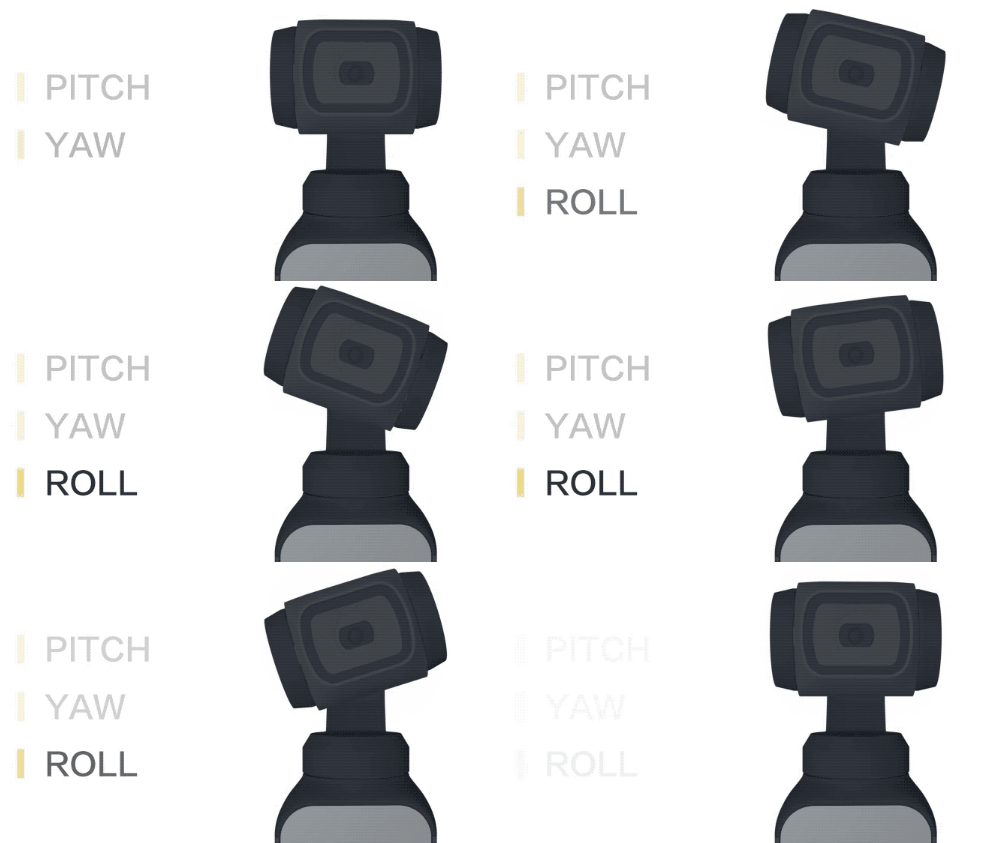
A 3-axis stabilized handheld camera can effectively reduce shake by stabilizing the camera through the pitch, yaw, and roll.
FOLLOW MODE
Follow Mode is the most frequently used mode that supports stabilization in three directions. The gimbal moves consistently with the handle to ensure stable and smooth footage.
TILT LOCKED
In Tilt Locked mode, only the pan axis moves, supporting the same stabilization effect as Follow Mode. The pitch will be locked. Even if you sway the gimbal from side to side or up and down, the gimbal camera will still face the front direction. This mode is perfect for recording forward and backward motions, such as jogging or walking scenarios, ensuring that the basic composition stays the same.
FPV MODE
FPV mode offers you an immersive perspective. In FPV mode, the three axes are not locked and the gimbal provides more relaxed stabilization. As the gimbal rotates more flexibly in FPV mode, the footage you create will have a higher sense of immediacy. Use Osmo Pocket to record action-filled moments to create stunning and immersive footage.
PRICE VS PERFORMANCE
You can buy normal Pocket 2 about 379€, the the Creator Combo about 519€ doesn’t sound like a lot of money for all the feathers it have, for a 4k camera with a gimbal i think it's not a expensive gadget, for a consumer market, it could be viewed as being a little on the pricey side.
I personally think the price is ok given what it can do and its feature set.
FINAL THOUGHTS
The Pocket 2 addresses many of the original Osmo Pocket's shortcomings, which was a great tool to capture stabilized video footage quickly, but which had notable limitations. The larger sensor, faster and wider lens, improved autofocus capabilities, and additional mics make this a more robust tool for content creators, vloggers, and possibly even professional shooters looking to capture supplementary footage for big jobs.
The controls have gotten more intuitive, and it’s no longer easy to swap between shooting modes accidentally. The zooming capabilities and the Mini Control Stick accessory are incredibly useful—the same goes for the interchangeable grips. Although the Do-It-All handle is an accessory that needs to be purchased at an additional cost, we really think it’s worth paying extra. It performs well and makes it easy to use your smartphone to monitor, review, and download footage on the go and use the Pocket as a tool for live streams—something that we only see becoming more common as large in-person events are on hold.
WHAT I LIKED
- More wider then the predecessor;
- Better audio;
-Mini Control Stick with zoom capabilities;
- Improved autofocus.
WHAT I FEEL COULD BE IMPROVED
- WI-FI could be intrageted;
- Image quality drops when zoomed.
