
Fornax Lighttrack II Review
INTRODUCTION
We as photographers, face a big problem in astrophotography, even with a high aperture lens, we have to take photos wit a very high ISO's which and a shutter speed is the limiting factor in taking pictures of the night sky, give us a not very clean photography's.
With the camera and lens you already have, that has the potential to capture places that are light years away from Earth?
WHAT IS A MOTORIZED MOUNT USUALLY CALLED A TRACKER?
DSLR astrophotography is a very limiting genre in terms of what you can do with camera settings. We’ve discussed ISO settings and noise reduction before, but today we’re going to take a look at shutter speed. Because of our planet’s rotation, the shutter speed on wide-angle lenses is limited to about 25 seconds before stars start to show signs of streaks. Before we go on, however, we’ll call shutter speed by its proper name: exposure time. “Speed” implies short exposures, and we are nowhere near 1/500 of a second throughout this article.
Here’s where specialized instruments that seek to overcome the rotation of the Earth come in.
You’ve probably allready seen videos of huge telecopes moving during the night? Imagine your camera at the end of a telescope and hours of exposure time that capture the very faintest objects in the night sky. You’re now about to understand the importance of accurate tracking.
These mounts are also called “trackers” because they track the stars across the night sky as the Earth rotates, freeing you of exposure time limitations. Well, not exactly, but we’ll cover this in this review of the LighTrack II from Fornax Mounts.
If you are looking for a lightweight portable tracking mount for your DSLR or small telescope? Then the Fornax LighTrack II may be the mount for you.

ABOUT FORNAX
Fornax has been developing and producing astronomical equipment for 20 years now. His main focus is manufacturing astronomical mounts, but our range includes other astronomical auxiliary products. In addition to private projects they have been involved in such prestigious projects as the HAT (Hungarian Automated Telescope) project, one of the most successful projects in exo-planet exploration, or the BlackGem project.
They customers include Harward and Princeton universities, mounts are used by many famous astrophotographers, and their award winning pictures taken with the help of our products stand as testament to the quality.
SUPPORT SCIENCE
More than 20 years ago we began working on a robotic telescope system developed specifically for the discovery of exo-planets. The project ran under the name HAT (Hungarian Automated Telescope), in those in cooperation with Harvard University, now replaced by Princeton University. The HATnet and HATsouth projects have discovered nearly 140 exo-planets. In addition, we participate in the mechanical part of BlackGem, a project aimed at researching gravity waves. We use our scientific research expertise in our products developed for everyday users.
PACKAGING AND UNBOXING
After opening we can find this inside the package:
1 - A Box with the Tracker:
1.1 - Lightracker
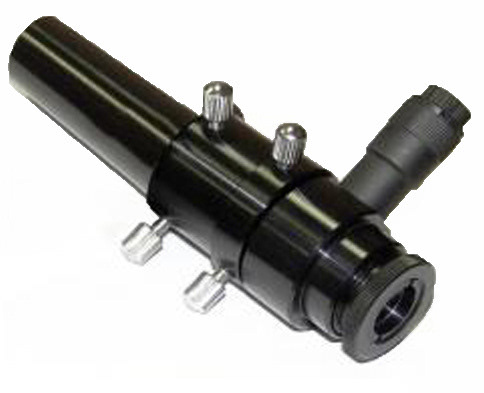
1.2 - FMPS-10 Illuminated Polarscope
2 - A box with the Wedge
1.1 - FMW-200 Wedge
1.2- Plactic bag wit 3 screws and hand lever

SPECS
Speaking about the tracking gears, the LighTrack II is supposed to be one of the most accurate trackers out there at the time of writing. Unfortunately, I don’t have any comparison, so I’ll leave verification to others who do. Every unit is supplied with the results of its factory calibration in the form of a graph. And trust me when I say that if the periodic error is +/-1 arc over 8 minutes, the tracking is pretty damn accurate.
It tracks for a period of two hours before you need to slew the mount back to its starting point. The maximum recommended load is 6 kilograms and as for the maximum focal length, it’s not recommended to go above 300mm. At 300mm though, it’s safe to shoot 6 minute exposures. But with an autoguider and counter weights, it’s possible to extend these specs even further. The LighTrack II comes autoguide prepared.
- Maximum Tracking Time: 107 minutes
- Periodic Error: < +/-1 arc, (8 min)
- Recommended longest focal lenght : 1000mm
- Recommended max telescope weight (with balanced counterweight-ONLY FMC-100!): 12KG
- Longest Useful Exposure Duration: 6 minutes
- Maximum Payload Capacity (without counterweight): 6Kg
- Tripod fixing : 3/8" or 1/4" photo thread
- Camera (ballhead) fixing : 3/8" photo thread
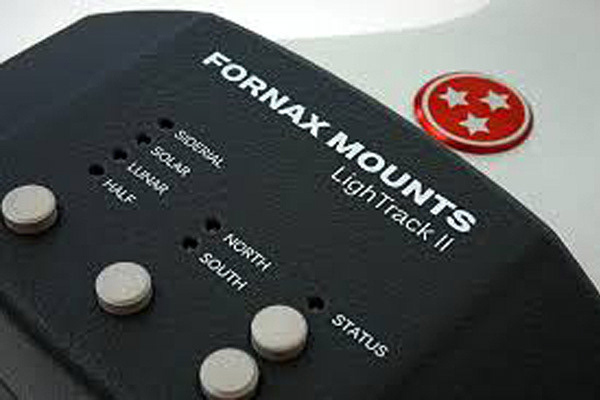
- Tracking Speeds: Sidereal, Solar, Lunar, Half
- Tracking Directions: Northern or Southern Hemisphere
- Auoguider Input: Yes
- Dimensions: 280 x 140 x 80 mm
- Mount Weight: 1.3Kg.
- Built-in Battery: No
- Power: 5.5/2.1 center positive DC plug
- Current draw: ~150 mA
- 12 volt DC adapter
BUILD QUALITY
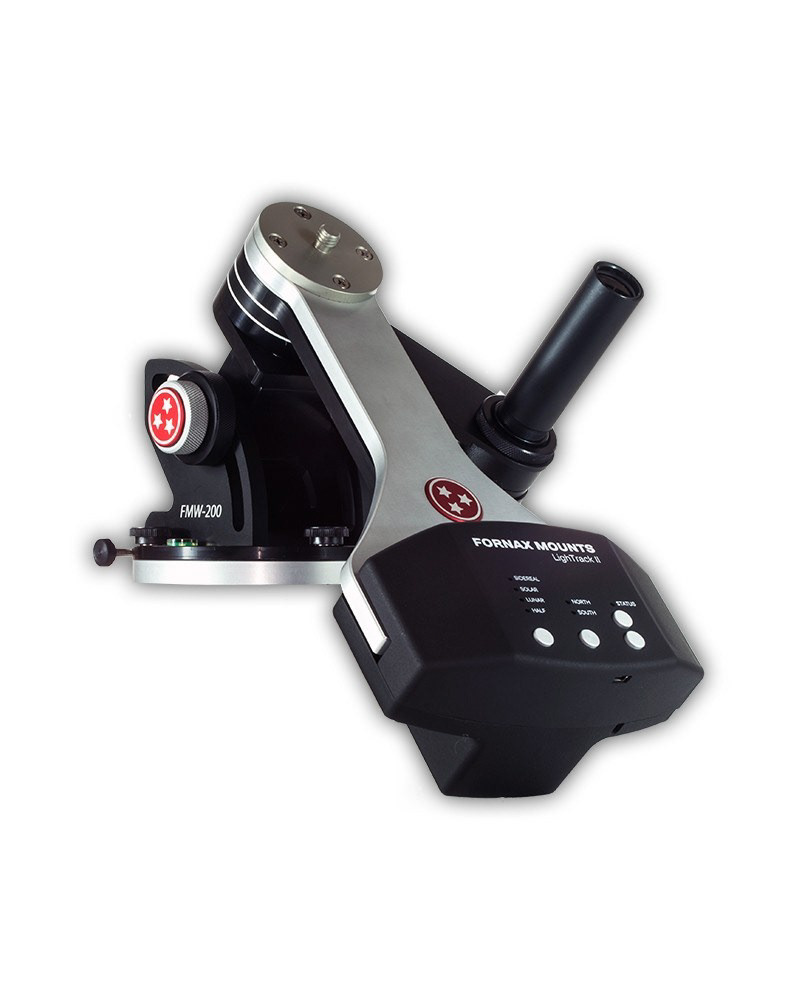
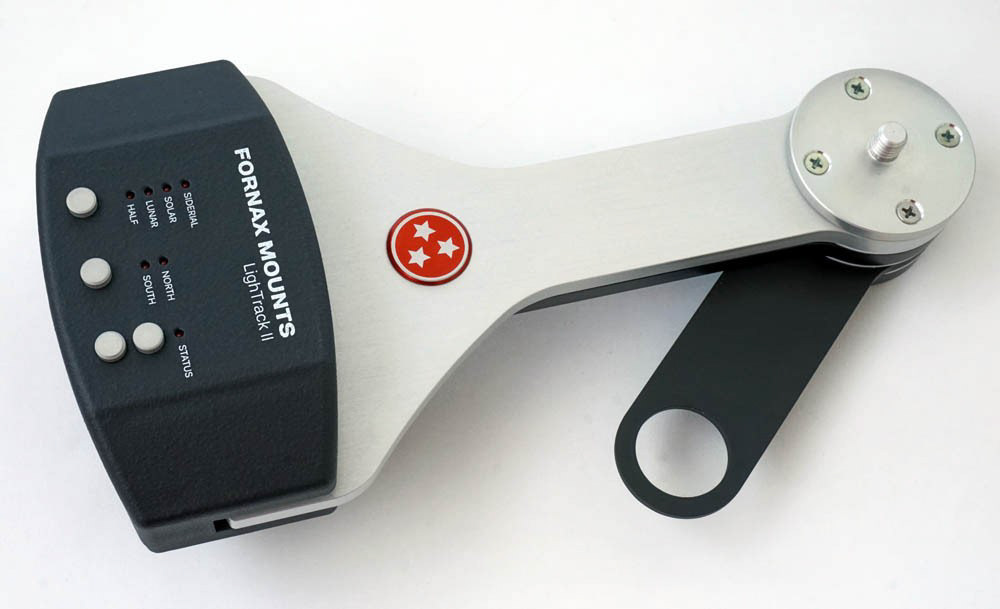
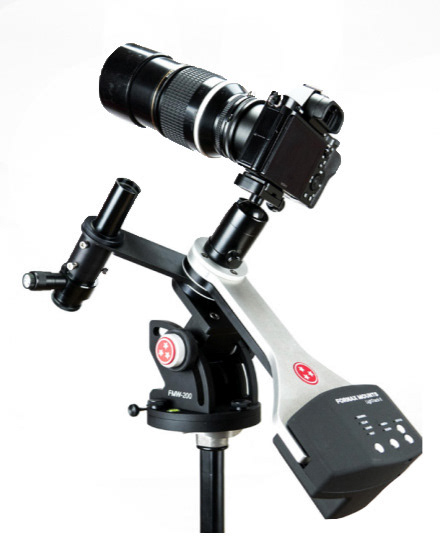
The LighTrack II is by far the prettiest camera tracker I’ve ever see, and one you could proudly display at star parties and astronomy events for years to come. The attention to detail from the high-end UV coatings on the black cover of the mount to the Fornax logo in the wedge base is evident.
This design is as beautiful as it is capable, but the added weight and profile of the LighTrack II also mean that a serious tripod is needed to mount it.
INSTALATION
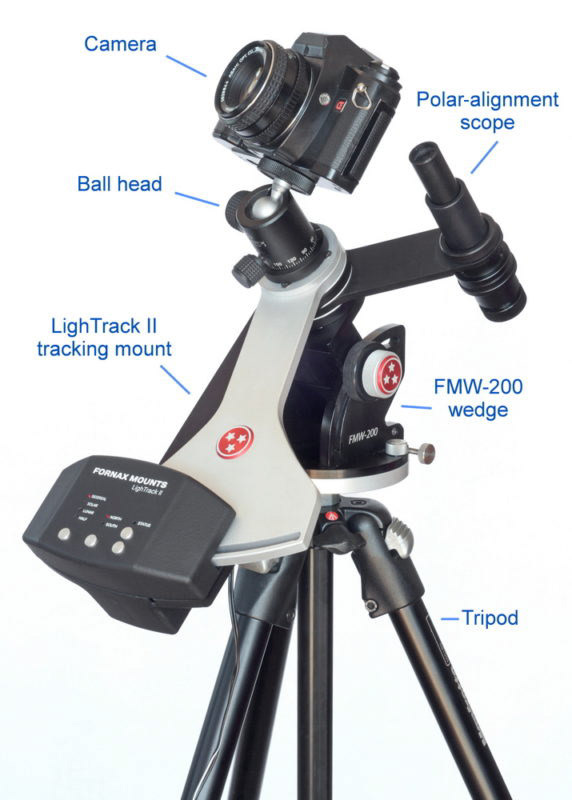
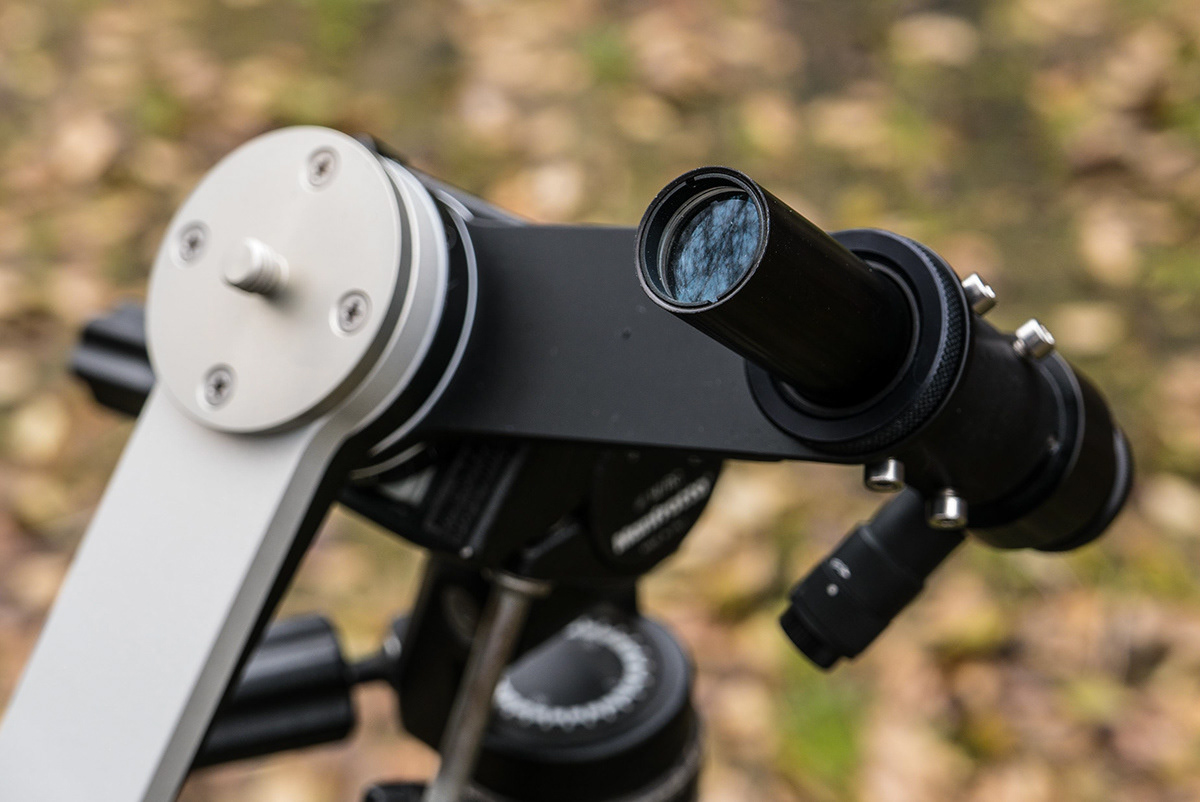
Don’t be fooled by the small size of the LighTrack II. It’s a very powerful and accurate tracking mount and, with proper polar alignment, you will get beautiful pinpoint stars in your long exposure photos. In order to get the best out of your tracker, we recommend using it with our FMW-200 equatorial wedge and a polarscope. You can get a FMPS-10 polarscope from us or you can use your own. Mount the tracker to the equatorial wedge using the two supplied screws then mount the assembly on a sturdy tripod. We strongly suggest weighing down the tripod to get more stability.
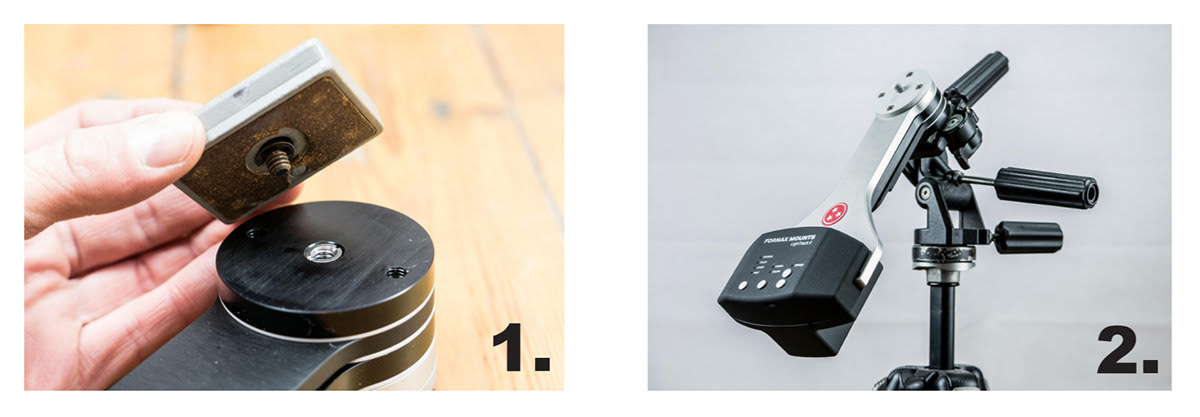
Using your own Head:
- Fix the photo plate (part of the 3D head) to the LighTrack II mount with the standard 1/4” photo thread which takes place at the buttom of the mount (1).
- Fix the LighTrack II to the 3D head with the relaise clamp (2). Please make sure the plate is fixed well to the mount!
Using FMW-200 Wedge:
- Fix the FMW-200 Wedge to the tripod with the 3/8” standard photo thread (1-2).
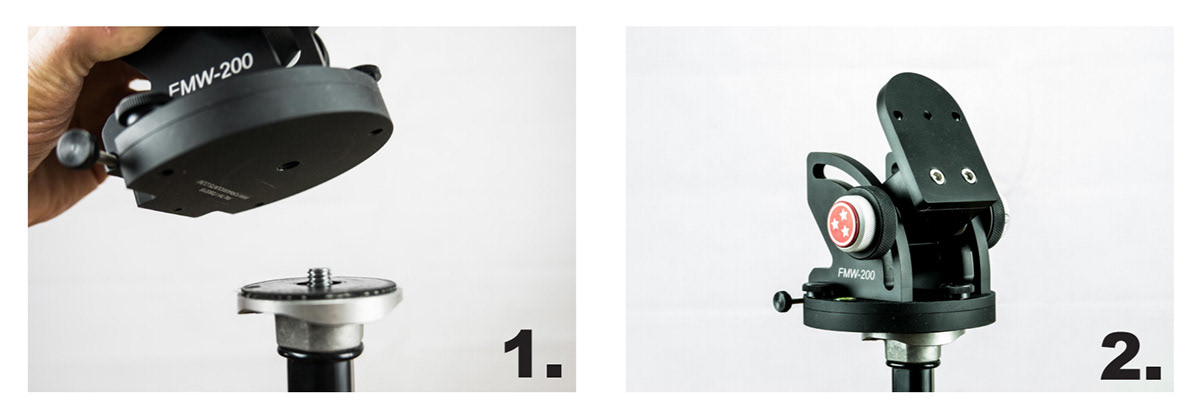
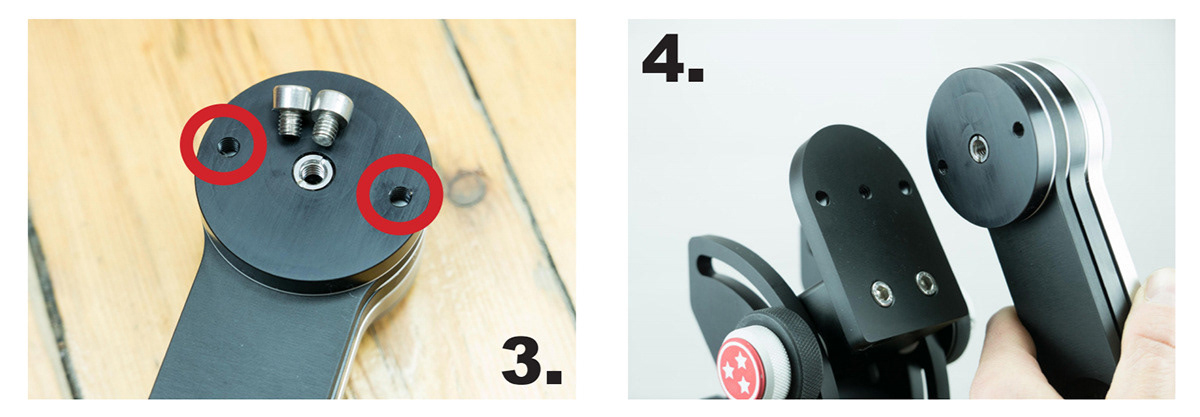
- The LighTrack II mount can be fixed to the FMW-200 Wedge easily with the two M6x6 screws (included) (3-4).
- Balance the FMW-200 Wedge with the bubble spirit level using your tripod’s legs (5- 6).

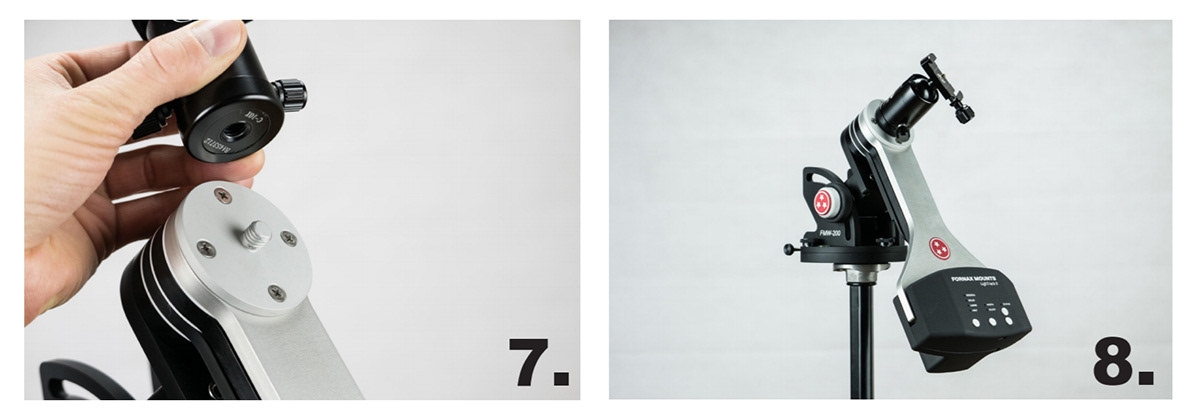
- Fix your ballhead to the LighTrack II mount with the 3/8” photo thread (7-8).
- Rotate the polarscope arm to a comfortable position. (9-12).
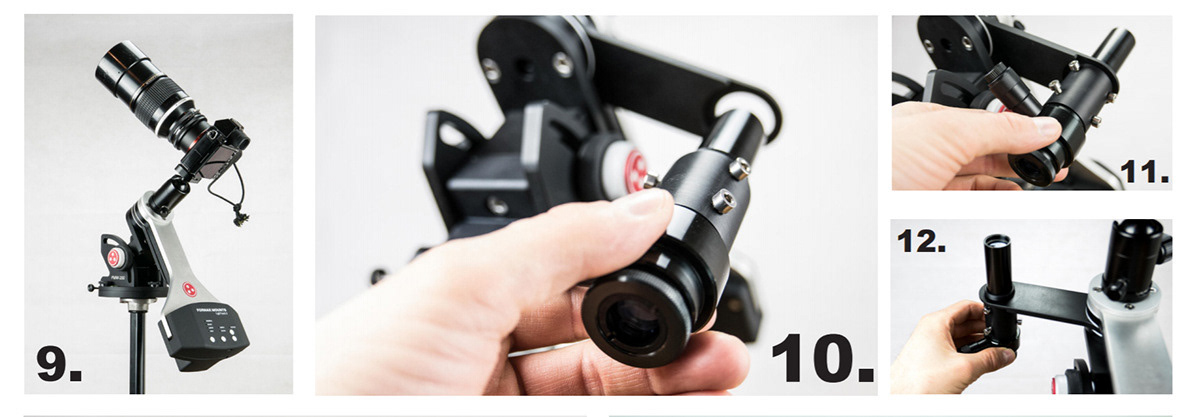
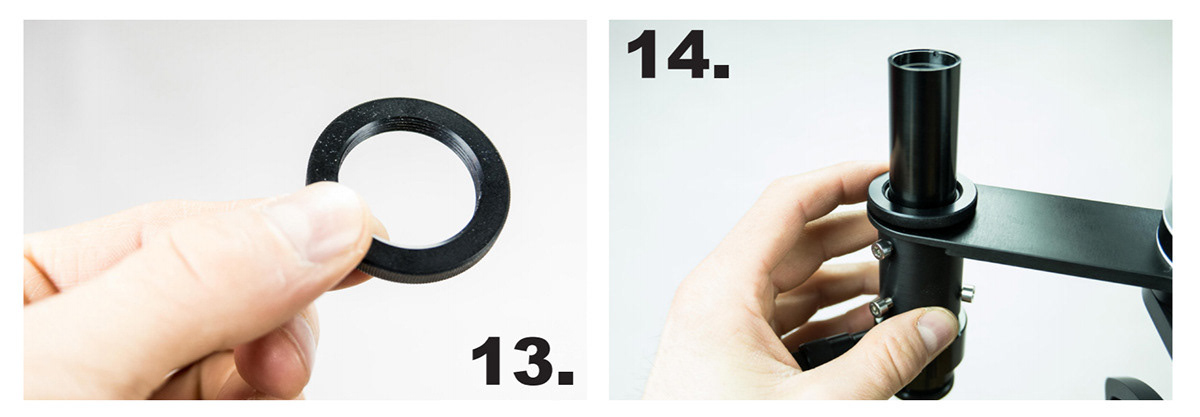
- Fix your polarscope with the M28x1 threaded ring (included) (10- 14).
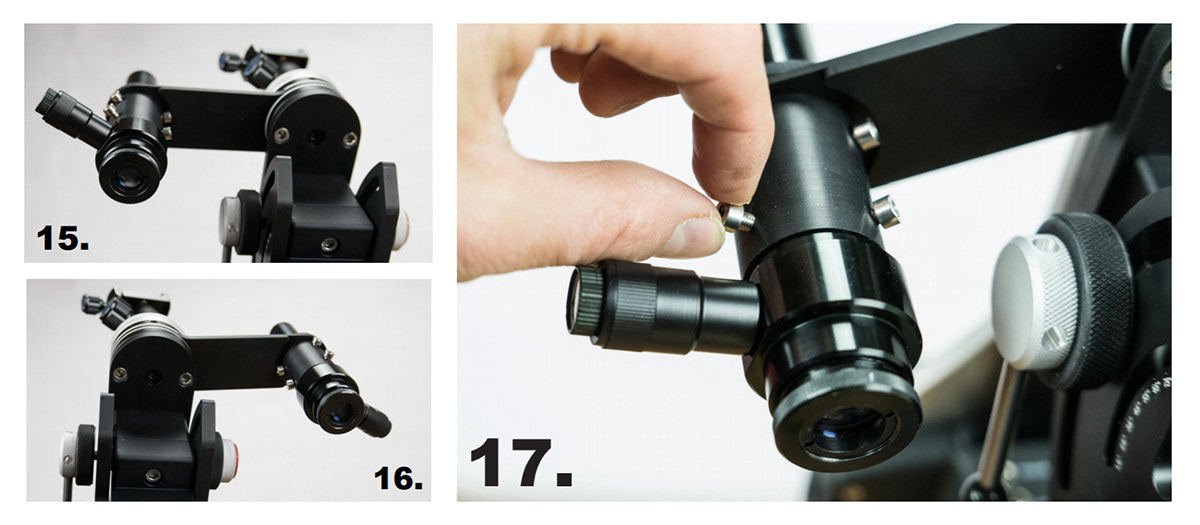
- If you have the FMPS-10 Illuminated Polarscope or you use the Universal Polarscope Adapter first you need to align your scope: Rotate the polarscope arm 90 degrees (15).
- We call it position one. Choose a long distance point object. Set this point to the center of the scope’s wiev of field. Rotate the polarscope arm 180 degrees (16).
- We call it position two. The polarscope is aligned if the point still in the center. If not you need to set the six thumbscrews on the Universal Polarscope Adapter (17) .
Polar alignment instructions
It’s now time to polar align the mount. In the Northern hemisphere we use Polaris, the North Star, as a guide, while in the Southern hemisphere we use the star Sigma Octantis. We recommend doing this during twilight, after Polaris or the constellation of Octans become visible. This way, you will be ready to take photos when proper night sets in. Just by sighting alongside the tracker, place your tripod so that the Right Acension axis of the LighTrack II (the rotation axis of the mount) roughly points North or South, depending on where you are on Earth. For accurate tracking the base of the wedge needs to be level. The FMW-200 wedge has a bubble level on its base to guide you through the process. Look at the bubble and see if the system is parallel to the ground. If the bubble is in the centre of the circle, you’re all set. If not, you will need to adjust the tripod legs until it’s level. Now, slide out the polarscope bracket and mount the scope inside it. If you have a different polarscope than the one we sell, contact us for getting the right adapter for it.
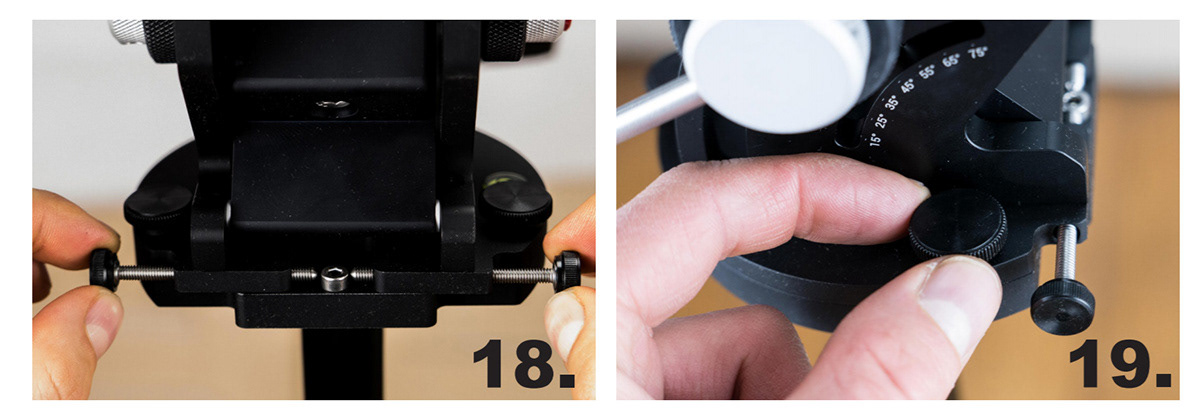
- In order to polar align the tracker you will need to move the wedge in two directions: altitude and azimuth. For altitude movement, you use the two large rotating knobs on the sides of the wedge. For azimuth motion you use the two long and thin screws on the opposite side of the wedge as your actual tracker. When moving the wedge in azimuth (left - right), you will have to un-tighten the three screws on the base of the wedge. (18-19)
Un-tighten the blocking nuts of the altitude control so that the wedge will easily slide up and down when you rotate the silver knobs. On the side of the wedge, you will find a latitude scale. Rotate the silver knobs until you set a latitude as close as possible to the one you are at. Now, look through the polarscope and try finding Polaris or Sigma Octantis in the field of view. If it’s not there adjust both altitude and azimuth controls until you get the star in the field of view. Note that you don’t have to centre the star; it’s the celestial pole that need to be in the centre. (20-21)

Now, using the different markers in your polarscope field of view, align all items according to the instructions of the polarscope. We suggest using a polar aligning app to help you in the process as polarscopes need to be rotated depending on the time of night when you do the alignment. Using the app will make the process a lot more straight forward.
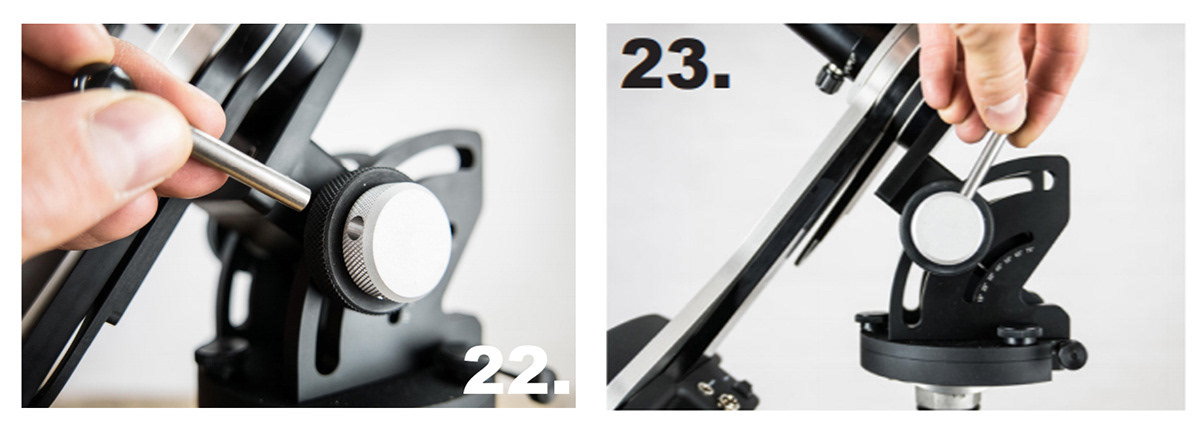
Once you are happy with your alignment tighten the blocking nuts of the altitude slider and the blocking screws of the base plate.(22-23)

FMPS-10 Polarscope
Polar alignment in North hemisphere:
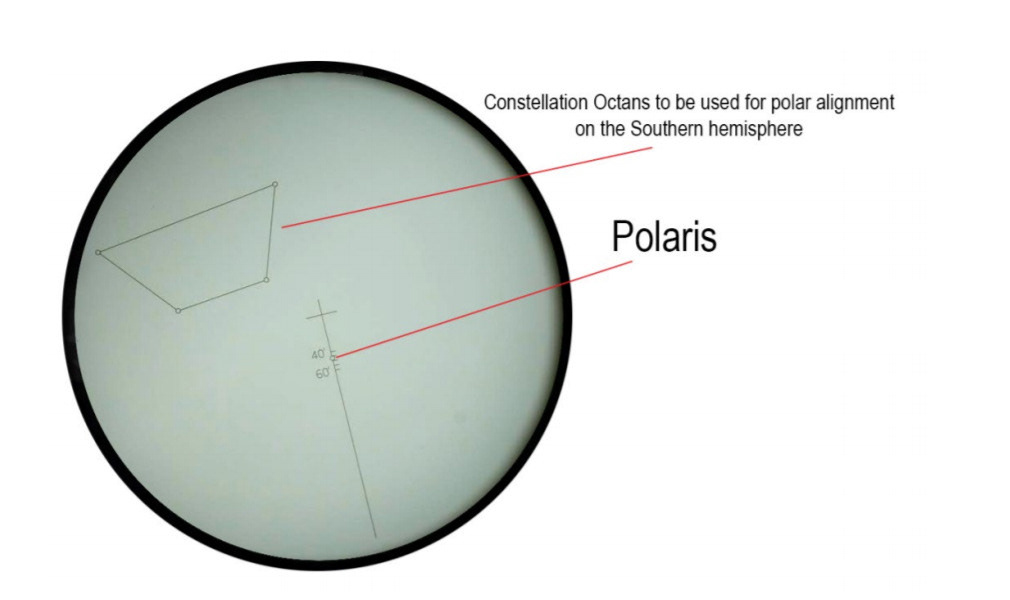
This image shows the field of view of the polarscope. Align the directional line to point at Kochab in Ursa Minor, then move your mount so that Polaris falls into the small circle. It's done. (Don't be mistaken, the asterism in the field of view is not part of the Big Dipper, it is four stars of the constellation Octans to be used for polar alignment on the Southern hemisphere.)

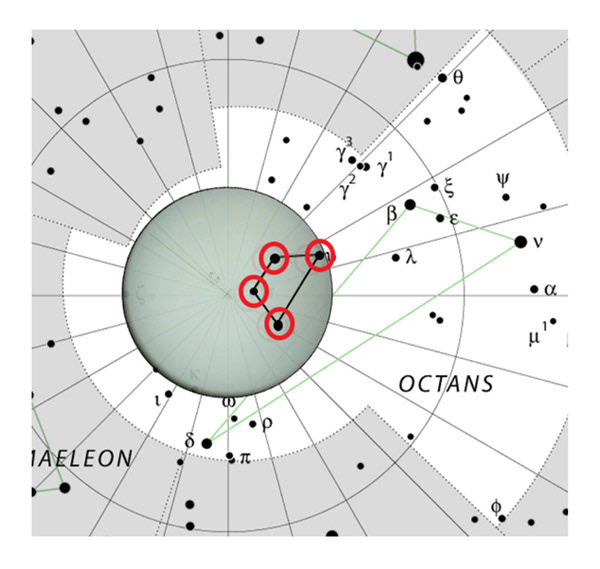
Polar alignment in Southern hemisphere:

Start Your Tracking:
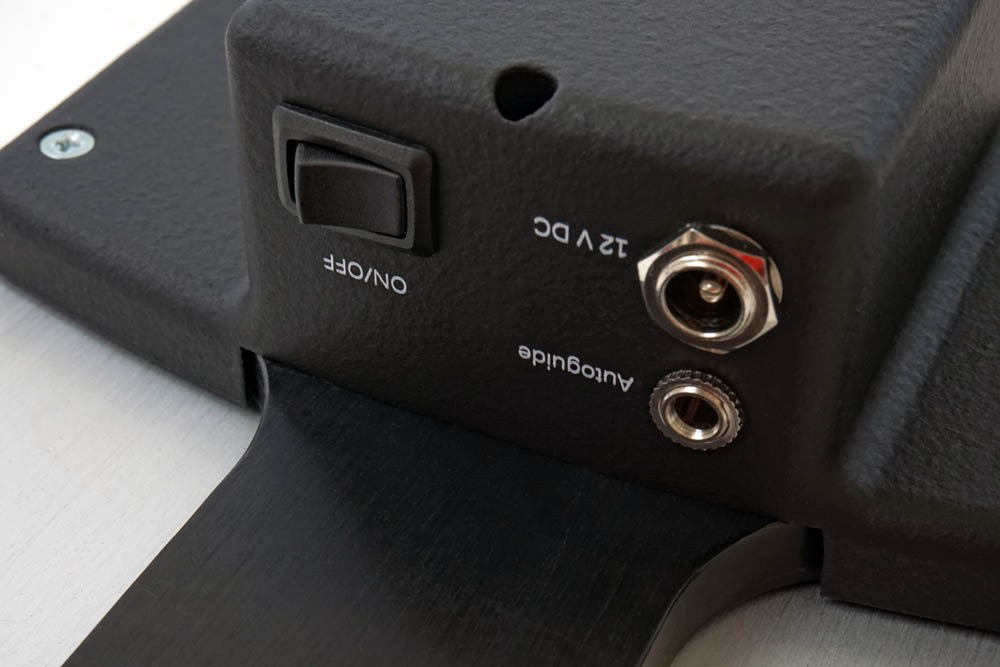
On the LighTrack II, you’ll find a set of buttons. The first button switches between tracking modes. “Sidereal” means that it follows the night sky, which is the setting for deep sky astrophotography. With the lunar and solar settings, you can track the moon and sun respectively. But a warning: do not go out and take long exposures of the sun unless you are absolutely sure what you’re doing. The final option is half sidereal tracking, which is a good starting point if you want to combine landscape and astrophotography into a single image. The next button lets you choose between the northern and southern hemispheres, and the last two buttons will slew (move) the mount toward either end of the tracking gears. The tracking starts automatically when you turn the mount on with the on/off switch on the bottom and there’s a very subtle audible signal to tell you it’s active
You are now ready to mount your camera on the tracker, power it up and shoot.
Clear skies!
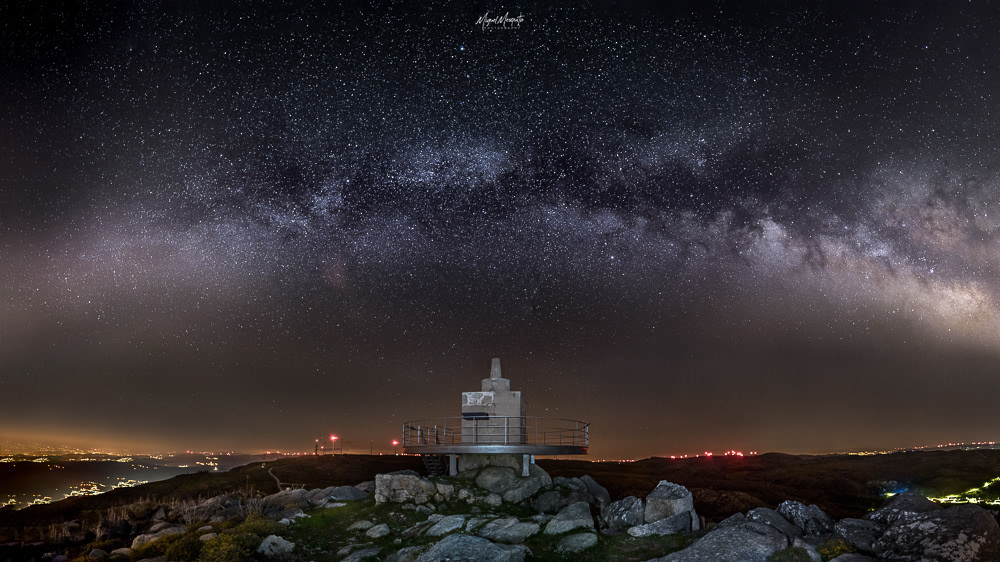
IN THE FIELD ACTION
MY CONCLUSION
Astrophotography isn’t a genre for beginners. The Fornax Mounts LighTrack II is an impressive star tracker to behold first-hand. It is highly capable and lives up to the lofty tracking accuracy specifications.
You really have to invest a lot of time in learning the ropes of managing exposure, noise, polar alignment, and even develop a familiarity with the night sky. Deep sky photography is about capturing the things you do not see with the naked eye and motorized mounts are perfect to bring the science behind all this to backyard astrophotography.
The Fornax Mounts LighTrack II is a very high build quality tracking option that certainly won’t let you down in this regard. The challenge at the end of the day (pun not intended) is not the quality of LighTrack II, but to really educate yourself to handle such a specialized device. Fornax Mounts could supply more information targeted at photography enthusiasts buying their first motorized mount, because there is a lot to take in if you’ve never dabbled in astrophotography before. But once you get the hang of it, it’s going to take a very long time before you reach the limits of this mount’s top capabilities.

What I Liked
- Periodic Error: < +/-1 arc, (8 min)
- Facility of the Polar alignment with the Wedge
- Maximum Payload Capacity (without counterweight): 6Kg
What I Feel Could Be Improved
- Could have a battery, or sold as a Accessorie